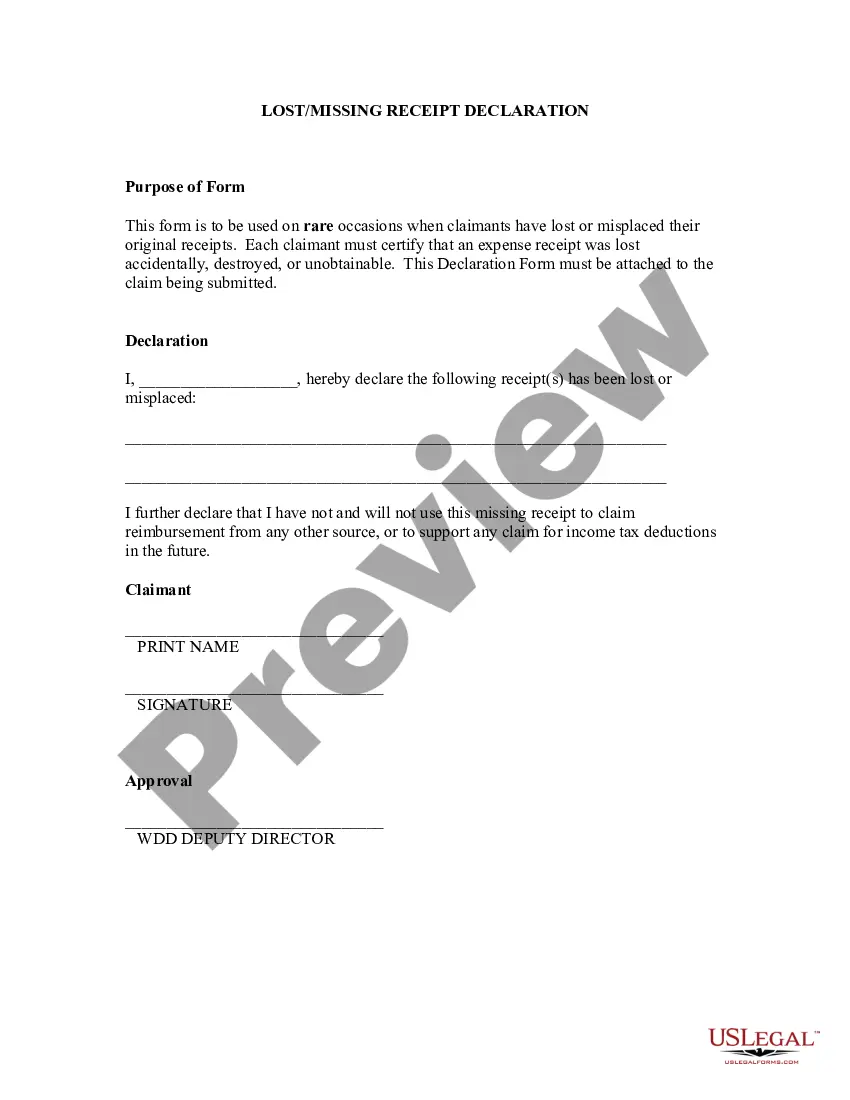
Lost Receipt Form
Overview of this form
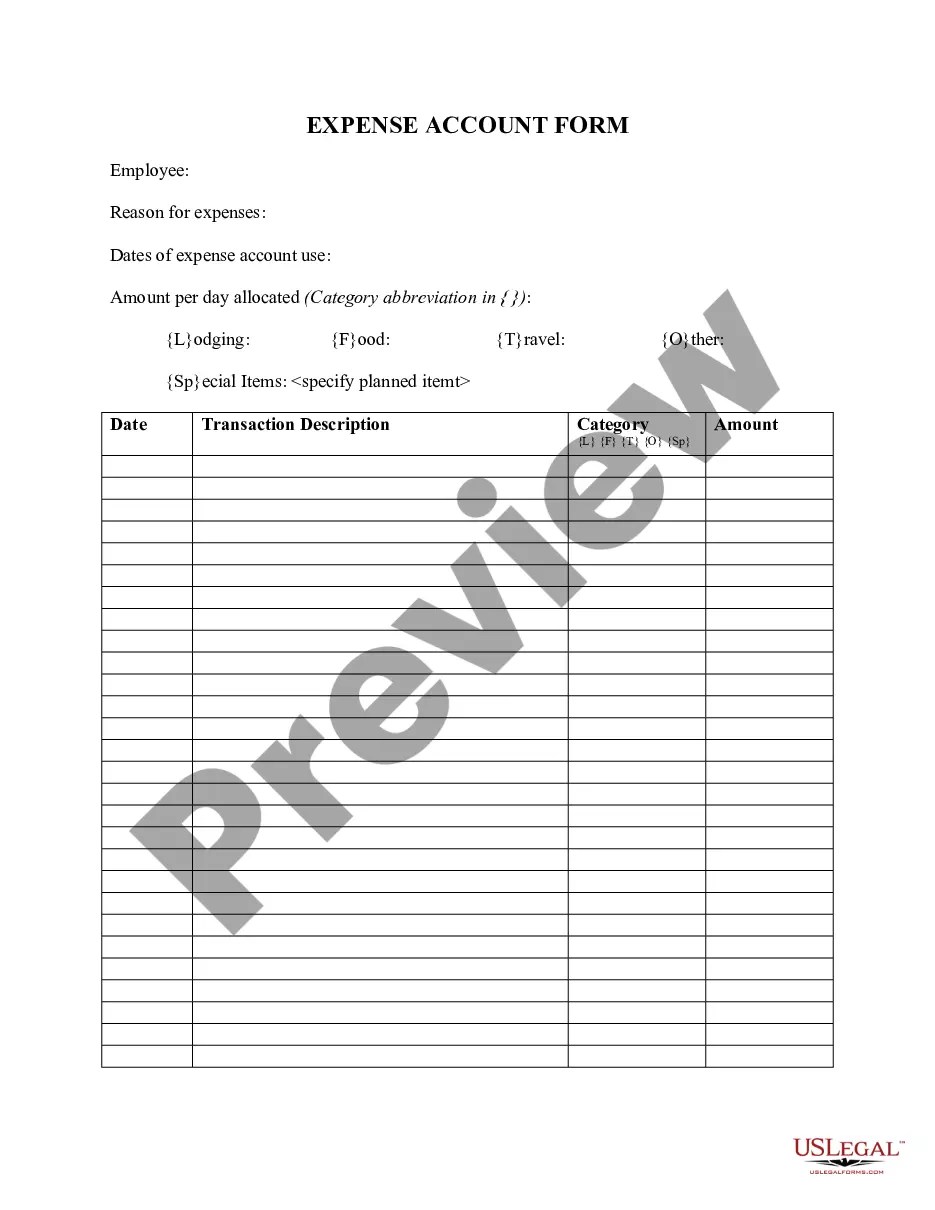
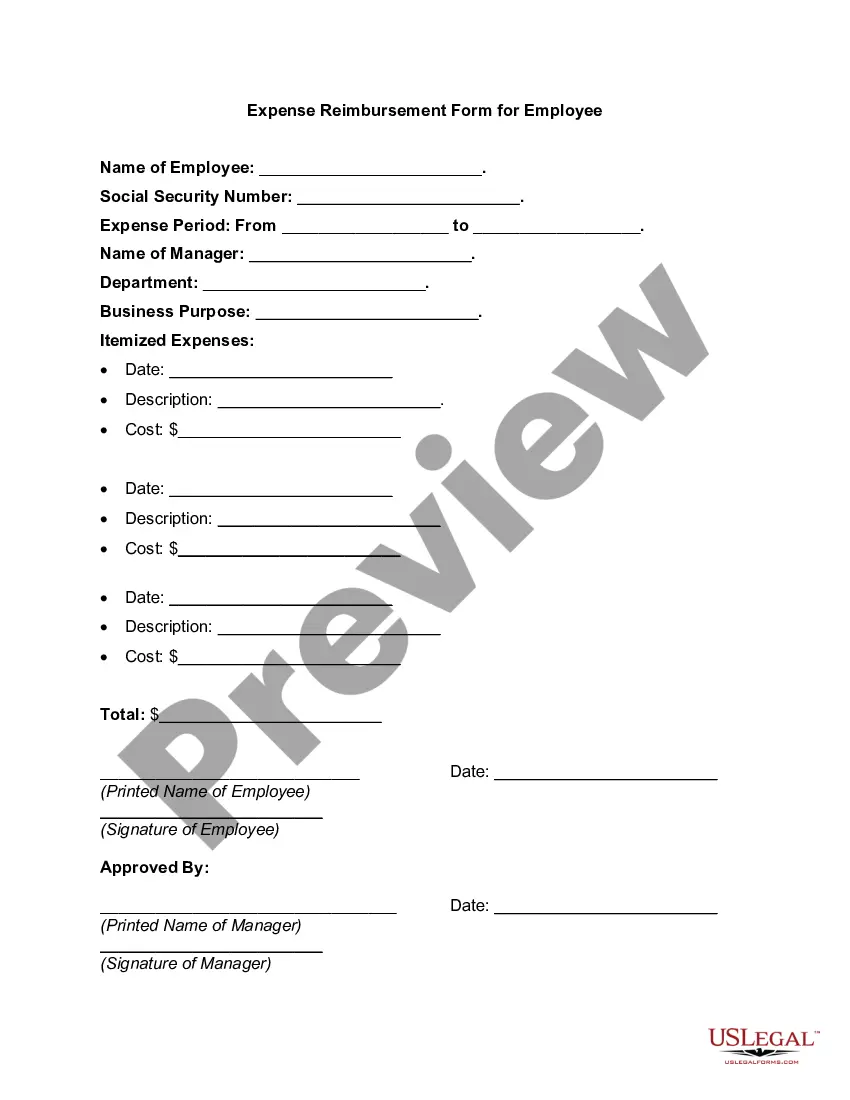
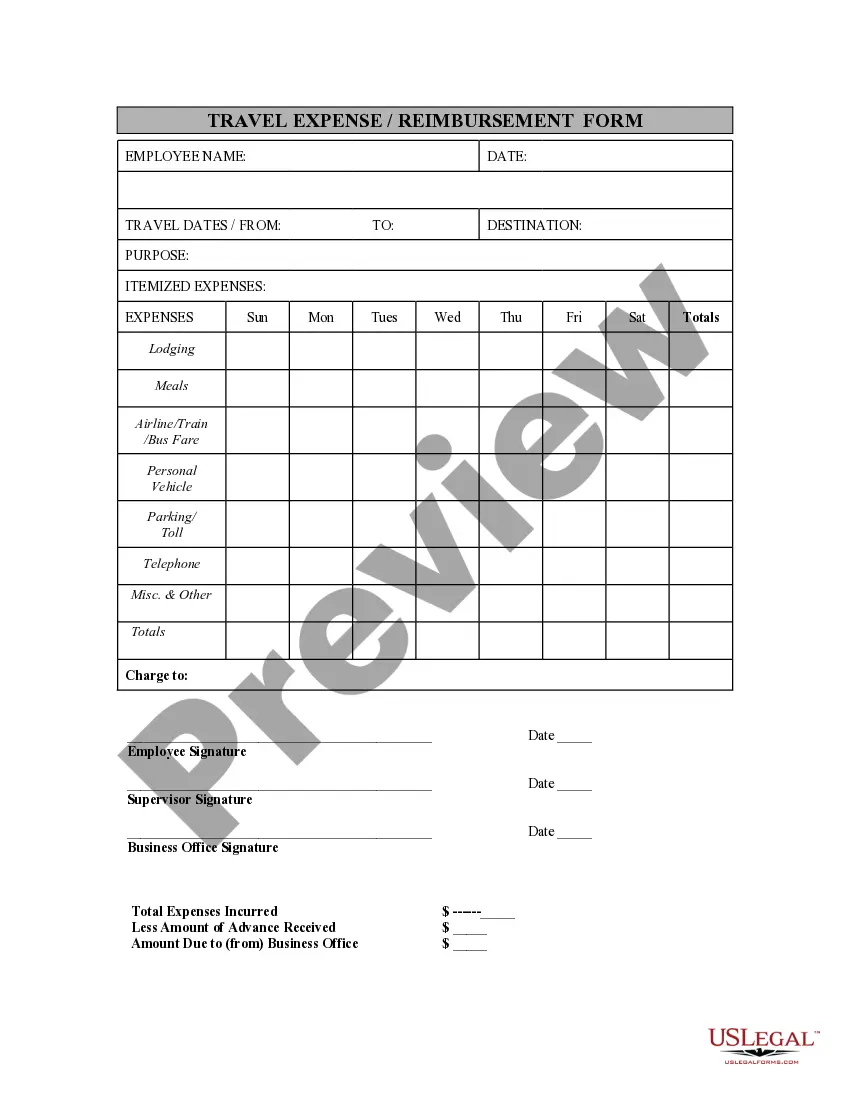
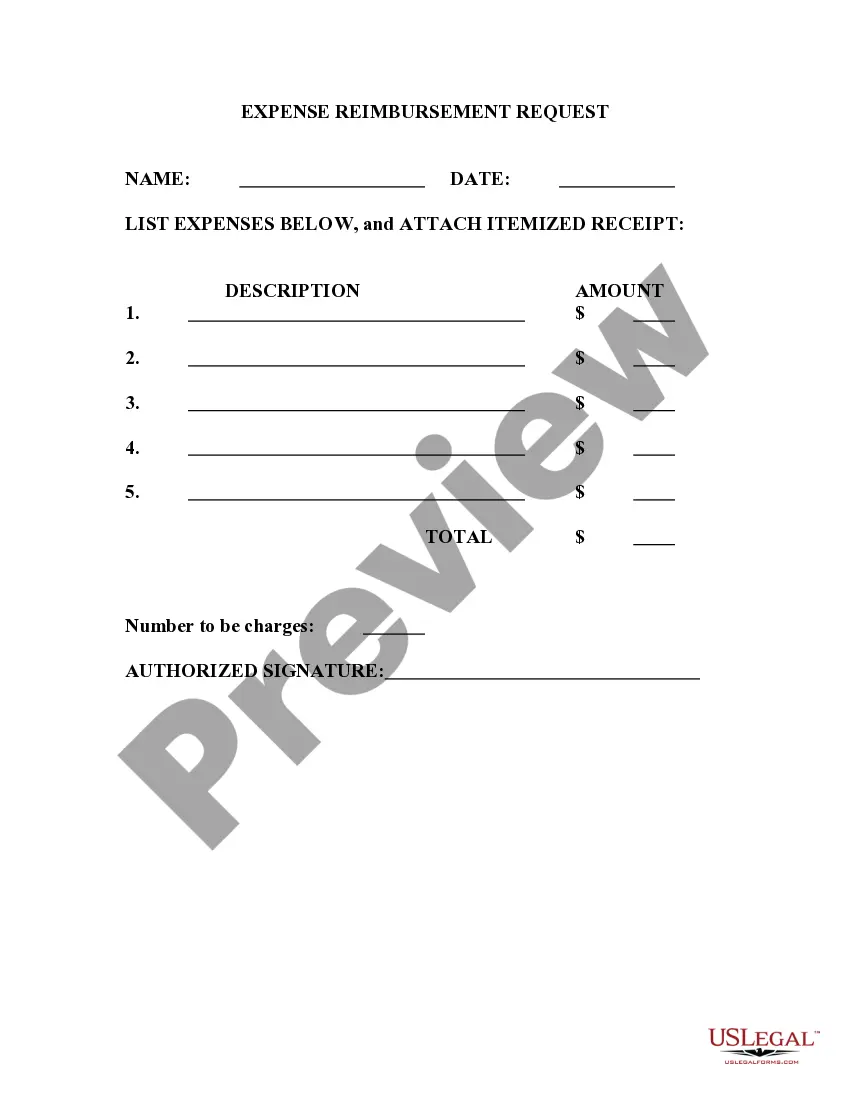
The Lost Receipt Form is a document used for requesting reimbursement for expenses incurred while conducting company business, specifically when original receipts are not available. Unlike standard expense reimbursement forms, this form specifically addresses situations where receipts have been lost, ensuring employees can still receive their due reimbursements.
Form components explained
- Identification of the lost receipts and corresponding expenses.
- Declaration confirming no other reimbursements have been received for the stated expenses.
- Signature line for the employee submitting the form.
- Date field for recording when the form is completed.
Situations where this form applies
This form is needed when an employee has incurred expenses while performing work-related activities and has lost the receipts necessary for traditional reimbursement. Situations may include business meals, travel expenses, or office supplies purchased on behalf of the company.
Who this form is for
- Employees who have lost receipts for business-related expenditures.
- Staff seeking reimbursement for expenses that lack proper documentation.
- Anyone needing to formally declare missing receipts to HR or payroll departments.
Steps to complete this form
- Enter the details of the lost receipts and the corresponding expenses.
- Indicate the total amount being claimed for reimbursement.
- Check the box or provide a statement confirming you have not received any other reimbursements for these expenses.
- Sign the form in the designated area.
- Fill in the date when you are submitting the form.
Notarization guidance
Notarization is generally not required for this form. However, certain states or situations might demand it. You can complete notarization online through US Legal Forms, powered by Notarize, using a verified video call available anytime.
Get your form ready online
Our built-in tools help you complete, sign, share, and store your documents in one place.
Make edits, fill in missing information, and update formatting in US Legal Forms—just like you would in MS Word.
Download a copy, print it, send it by email, or mail it via USPS—whatever works best for your next step.
Sign and collect signatures with our SignNow integration. Send to multiple recipients, set reminders, and more. Go Premium to unlock E-Sign.
If this form requires notarization, complete it online through a secure video call—no need to meet a notary in person or wait for an appointment.
We protect your documents and personal data by following strict security and privacy standards.
Make edits, fill in missing information, and update formatting in US Legal Forms—just like you would in MS Word.
Download a copy, print it, send it by email, or mail it via USPS—whatever works best for your next step.

Sign and collect signatures with our SignNow integration. Send to multiple recipients, set reminders, and more. Go Premium to unlock E-Sign.
If this form requires notarization, complete it online through a secure video call—no need to meet a notary in person or wait for an appointment.
We protect your documents and personal data by following strict security and privacy standards.
Typical mistakes to avoid
- Failing to sign the form before submission.
- Not providing specific amounts or details for expenses.
- Submisssion of the form without confirming no other reimbursement has been received.
Benefits of using this form online
- Convenient access: Download and complete the form from anywhere at any time.
- Editability: Easily fill in your specific details before submission.
- Reliability: Forms are drafted by licensed attorneys to ensure they meet legal standards.
Legal use & context
- The completed form serves as a formal request for reimbursement and may be subject to company review.
- Failure to complete the form accurately could result in denial of reimbursement claims.
Quick recap
- The Lost Receipt Form is essential for employees needing reimbursement for expenses without original receipts.
- Ensure all expenses are clearly listed, and the form is signed and dated.
- Consult with your HR department regarding any additional requirements specific to your state or company policy.
Looking for another form?

Form popularity
FAQ
Check back through your credit card and bank statements to see whether your purchase shows up there, and if it does, you can print copies of your statements and use those as proof of purchase. Most companies will accept this as a replacement for a lost receipt.
- Upload your receipts on the Expenses screen of your DTS voucher. You can convert your paper receipts to electronic images by scanning them, taking a picture of them, or if you prefer the old school approach faxing them into DTS (using the Print Fax Cover Sheet link in DTS).
A Microsoft receipt template is just the ticket. A receipts template is free, customizable, and works well in a variety of situations.Browse the collection to find a template for receipt that fits your needs.
On the File tab, click New. Under Available Templates, do one of the following: To use one of the built-in templates, click Sample Templates, click the template that you want, and then click Create.
Name and details of the person who is sending the letter. Name and details of the person/company to whom the letter is been sent (recipient) Date of sending the acknowledgement letter. The subject of the letter stating the reason for writing it. Statement of confirmation of receipt of the item.
It acknowledges that the customer has paid for the goods or services sold. A receipt is a simple document issued by a vendor and given to the customer immediately after a sale.
You can create professional looking invoices with a template that you can customize for your business. Fill it out in Word or Excel and send it electronically as a PDF or print it. Find Word and Excel templates for: Invoices.
Add in your company details (name, address) in From section. Fill out client details (name, email, address) in For section. Write out line items with description, rate and quantity. Finish with the date, invoice number and your personalized brand.
Add in your company details (name, address) in From section. Fill out client details (name, email, address) in For section. Write out line items with description, rate and quantity. Finish with the date, invoice number and your personalized brand.