Assignment of Particular Account
Overview of this form
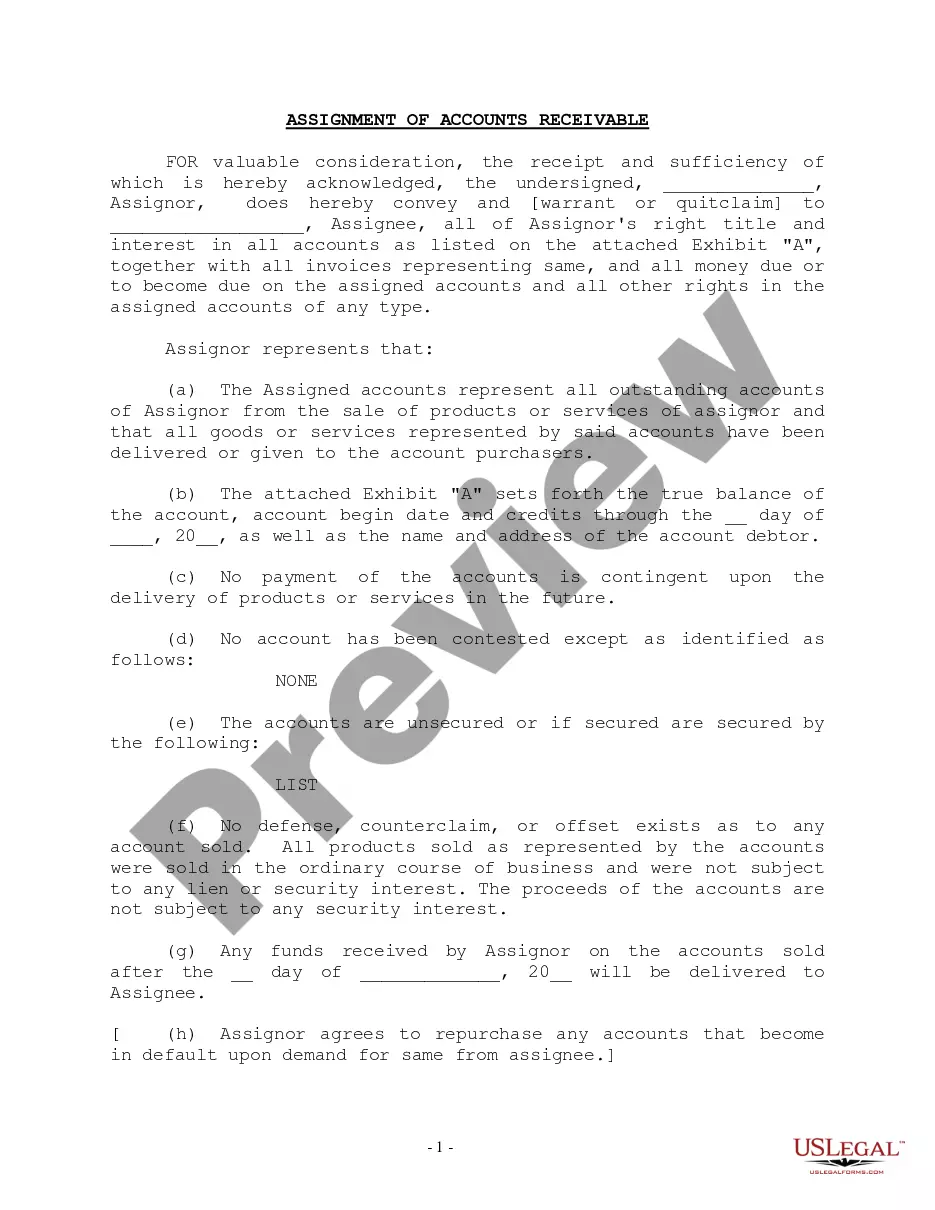
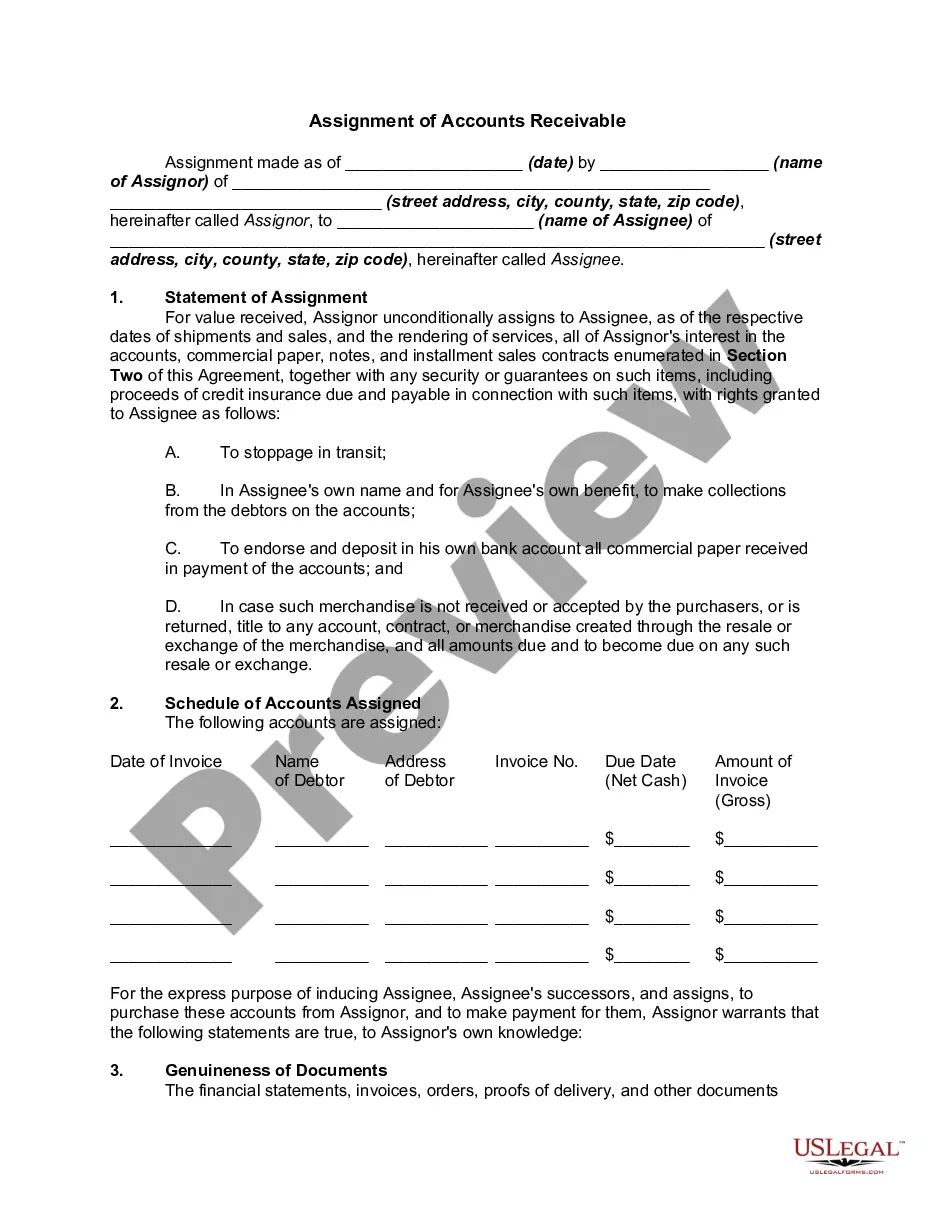
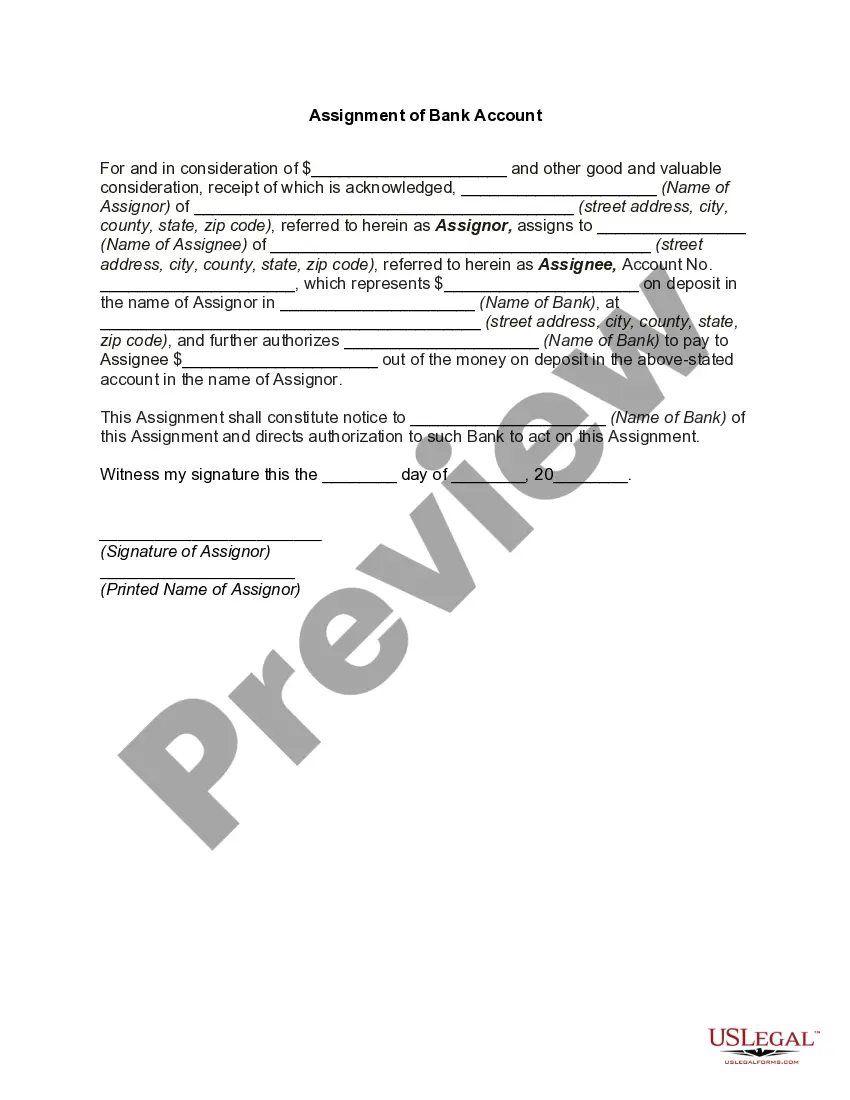
The Assignment of Particular Account is a legal document used to transfer rights to a specific account receivable from one party (the Assignor) to another (the Assignee). This form clearly establishes the terms of the assignment, detailing the rights being transferred and ensuring that the assignee has the authority to collect any payments associated with the assigned account. Unlike general assignment forms, this form is tailored to a specific account, providing clarity and security in the transfer of financial rights.
Form components explained
- Date of assignment: Specifies when the assignment takes effect.
- Name and contact information of the Assignor: Identifies the party transferring rights.
- Name and contact information of the Assignee: Identifies the party receiving the rights.
- Description of the account: Outlines the details of the account receivable being assigned.
- Authorization clause: Grants the Assignee the right to collect amounts due on the account.
- Signature of the Assignor: Confirms the agreement and legality of the assignment.
When to use this form
This form is useful in various situations, such as when a business needs to transfer its right to collect on an outstanding invoice to another entity, or when an individual assigns the collection of debts owed to them. It formalizes the arrangement between the parties and provides legal backing for the collection of payments, ensuring that the Assignee can effectively manage the assigned account.
Who should use this form
- Businesses needing to transfer accounts receivable.
- Individuals seeking to assign debt collection rights to another party.
- Financial professionals managing collections for clients or third parties.
- Creditors wishing to delegate collection responsibilities.
Completing this form step by step
- Identify the parties involved by filling in the names and addresses of the Assignor and Assignee.
- Enter the date when the assignment will take effect.
- Clearly describe the particular account being assigned in Exhibit A.
- Include any necessary acknowledgments regarding consideration received.
- Have the Assignor sign and date the document to validate the assignment.
Does this document require notarization?
This form does not typically require notarization unless specified by local law. However, having a notary acknowledge the signatures can enhance the document's enforceability and provide an additional layer of verification.
Get your form ready online
Our built-in tools help you complete, sign, share, and store your documents in one place.
Make edits, fill in missing information, and update formatting in US Legal Forms—just like you would in MS Word.
Download a copy, print it, send it by email, or mail it via USPS—whatever works best for your next step.
Sign and collect signatures with our SignNow integration. Send to multiple recipients, set reminders, and more. Go Premium to unlock E-Sign.
If this form requires notarization, complete it online through a secure video call—no need to meet a notary in person or wait for an appointment.
We protect your documents and personal data by following strict security and privacy standards.

Make edits, fill in missing information, and update formatting in US Legal Forms—just like you would in MS Word.

Download a copy, print it, send it by email, or mail it via USPS—whatever works best for your next step.

Sign and collect signatures with our SignNow integration. Send to multiple recipients, set reminders, and more. Go Premium to unlock E-Sign.

If this form requires notarization, complete it online through a secure video call—no need to meet a notary in person or wait for an appointment.

We protect your documents and personal data by following strict security and privacy standards.
Mistakes to watch out for
- Failing to specify the account details accurately.
- Not including the date of assignment.
- Incorrectly inputting the names or addresses of the parties.
- Forgetting to obtain the Assignor's signature.
Benefits of completing this form online
- Convenience of downloading and printing the form as needed.
- Editable fields provide the ability to input specific details directly.
- Reliable templates drafted by licensed attorneys ensure legal compliance.
Quick recap
- The Assignment of Particular Account transfers rights to a specified account receivable.
- Covers essential details to ensure validity and enforceability.
- Can be utilized by businesses and individuals needing to delegate collection rights.
Looking for another form?

Form popularity
FAQ
Most assignments need a title page, which should include: the title and number of the assignment. the course number and name. the due date.
First, carefully read the assignment. Conduct any necessary research to find information to include in your assignment. Make some notes and create a draft outline of the information you need to include in the assignment. Once your draft outline is complete, begin writing your text.
Just yesterday, Google released a new feature to Google Classroom that many teachers have been requesting for quite some time the ability to assign work to individual students! Now if you want to differentiate work according to student teams or learning styles, you can!
Go to classroom.google.com and click Sign In. Sign in with your Google Account. Click the class. Classwork. Click the assignment. View assignment. (Optional) To add a private comment to your teacher, under Private comments, enter your comment and click Post . Click Mark as done and confirm.
In classes created after April 17, 2019, posts to the Classwork page appear at the top. When you create an assignment, you can: Post to one or more classes. Post to individual students.
Step 1: Plan. Planning your assignment will help you get focused and keep you on track. Step 2: Analyse the question. Before you can answer a question, you need to know what it means. Step 3: Draft an outline. Step 4: Find information. Step 5: Write. Step 6: Edit and proofread.
Note: You can attach or create more than one file.
The title and number of the assignment. the course number and name. the due date. your full name and student number.
Topic sentence. Fresh rephrasing of thesis statement. Supporting sentences. Summarize or wrap up the main points in the body of the essay. Explain how ideas fit together. Closing sentence. Final words. Connects back to the introduction. Provides a sense of closure.