Collin Texas Advance Damage Release (Pipeline)
Description
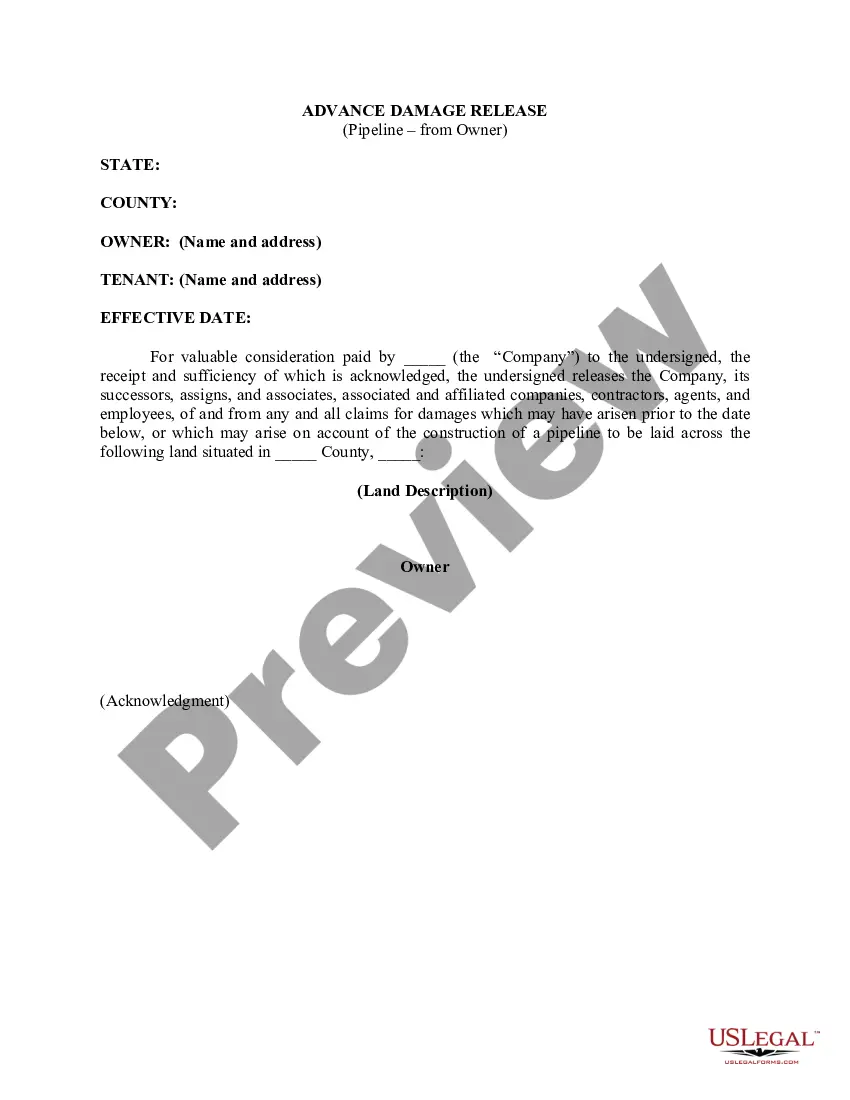

How to fill out Advance Damage Release (Pipeline)?
Laws and statutes in each domain differ from jurisdiction to jurisdiction.
If you're not a lawyer, it's simple to become overwhelmed by numerous regulations when it comes to drafting legal documents.
To steer clear of costly legal help while preparing the Collin Advance Damage Release (Pipeline), you require a validated template applicable to your area.
This is the easiest and most cost-effective method to obtain current templates for any legal purposes. Find them all in clicks and maintain your documentation organized with the US Legal Forms!
- Check the page details to confirm you've located the correct example.
- Utilize the Preview option or review the form description if it's available.
- Search for another document if there are discrepancies with any of your requirements.
- Click on the Buy Now button to acquire the template once you find the suitable one.
- Select one of the subscription options and Log In or create an account.
- Choose how you wish to pay for your subscription (either with a credit card or PayPal).
- Select the format you desire to save the document in and click Download.
- Complete and sign the template on paper after printing it or do it all electronically.
Form popularity
FAQ
Azure Pipelines - Release - YouTube YouTube Start of suggested clip End of suggested clip You can come into releases. And create the release pipeline from here what you can also do is goMoreYou can come into releases. And create the release pipeline from here what you can also do is go into the repos. Go into your repo. And you can select to set up a release from here.
To define a required template approval: In your Azure DevOps project, go to the service connection that you want to restrict. Open Approvals and Checks in the menu next to Edit. In the Add your first check menu, select Required template. Enter details on how to get to your required template file.
Sign in to your organization ( {yourorganization} ) and select your project. Select Pipelines, and then New pipeline. Select the location for your source code as either GitHub or Azure Repos Git. Select a repository. On the Configure your pipeline page, select Starter pipeline. Select Save and run.
Configure build pipeline in Azure devops classic editor and YAMLYouTube Start of suggested clip End of suggested clip Here you can configure that now. I will explain you how you can create this same build using MLSMoreHere you can configure that now. I will explain you how you can create this same build using MLS index. So for that go to the build and then click on new build pipeline didn't select this from here or
Artifact publish location: Select Azure Artifacts/TFS. On the Tasks tab, select Add Task. Select the Utility category, select the Publish Build Artifacts task, and then select Add. Path to Publish: Select the button to browse and select the script you created. Artifact Name: Enter drop . Artifact Type: Select Server.
How do release pipelines work? Pre-deployment approval: When a new deployment request is triggered, Azure Pipelines checks whether a pre-deployment approval is required before deploying a release to a stage.Queue deployment job: Azure Pipelines schedules the deployment job on an available automation agent.
Edit a pipeline (console) To edit a stage, choose Edit stage.To edit an action, choose the edit icon for that action, and then on Edit action, change the values.To add a stage, choose + Add stage at the point in the pipeline where you want to add a stage.To delete a stage, choose the delete icon on that stage.
The Azure DevOps project created a release pipeline to manage deployments to Azure. Select the release pipeline, then choose Edit. Under Artifacts, select Drop. The build pipeline you examined in the previous steps produces the output used for the artifact.
Create a release pipeline Go to the Pipelines tab, and then select Releases. Select the action to create a New pipeline.Select the action to start with an Empty job. Name the stage QA. In the Artifacts panel, select + Add and specify a Source (Build pipeline).
Configure Azure DevOps Webhook In your Azure DevOps project, select the project you'd like to generate notes from.To the left of the settings, select Service hooks.In the dialog, select Web Hooks, click Next. In the next dialog, select Release created from the dropdown, click Next.
")