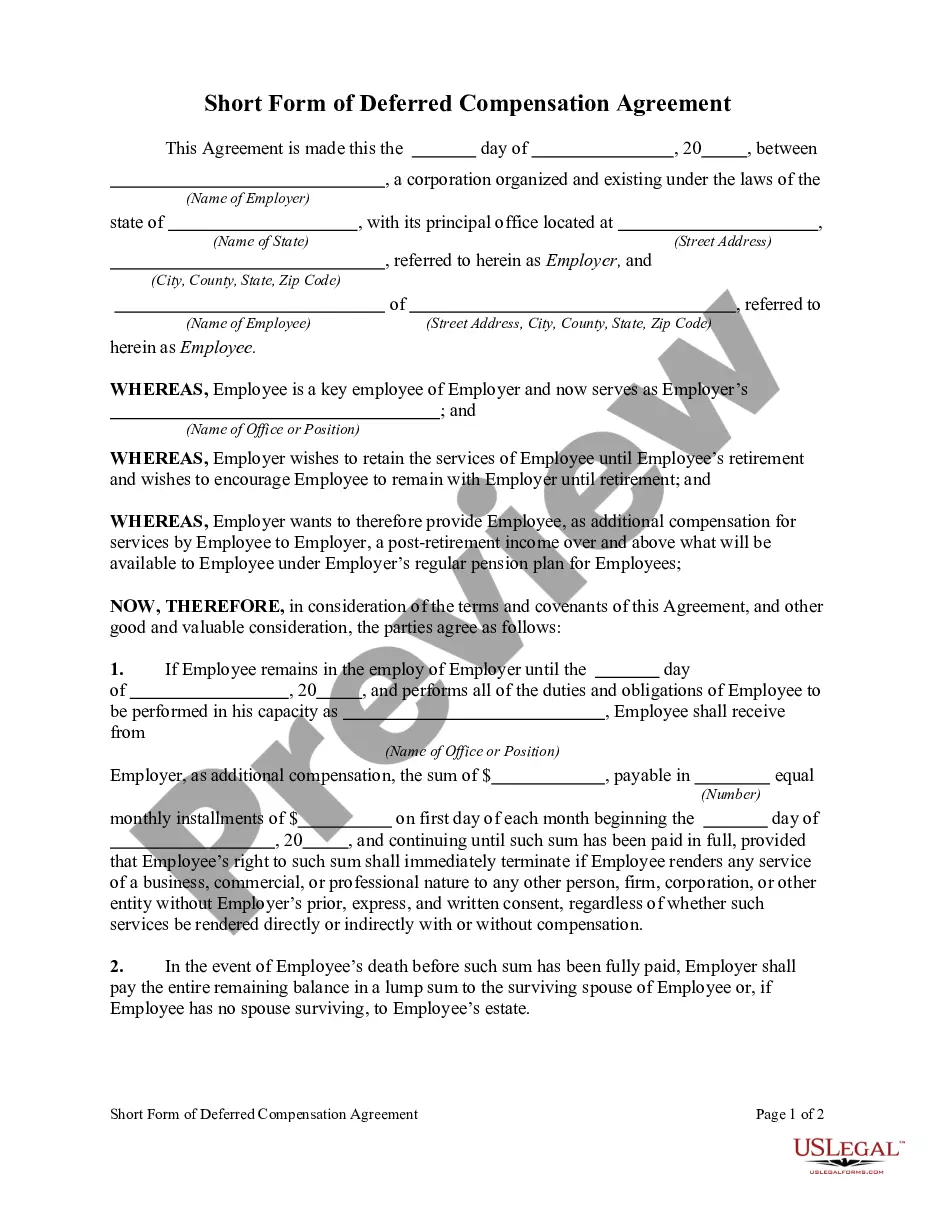
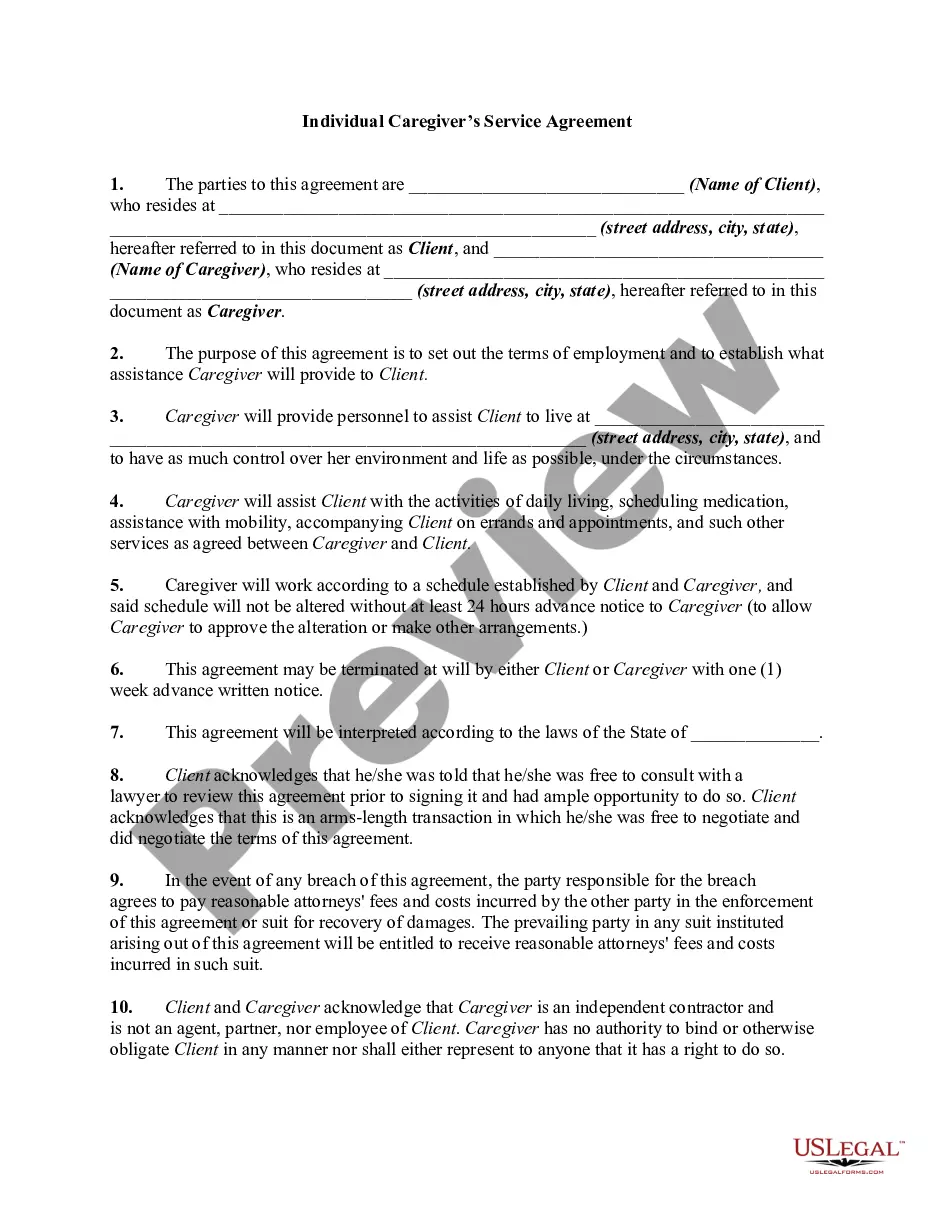
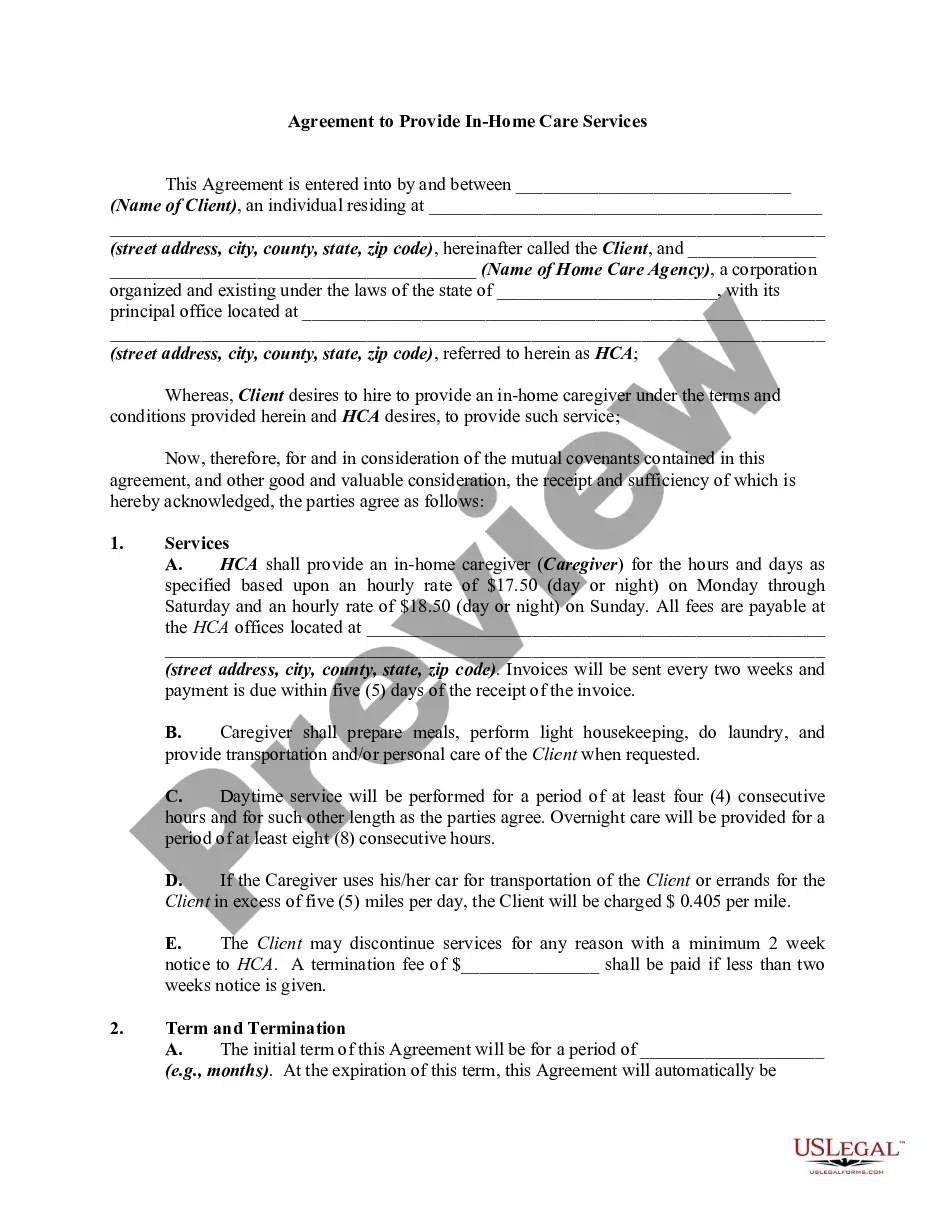
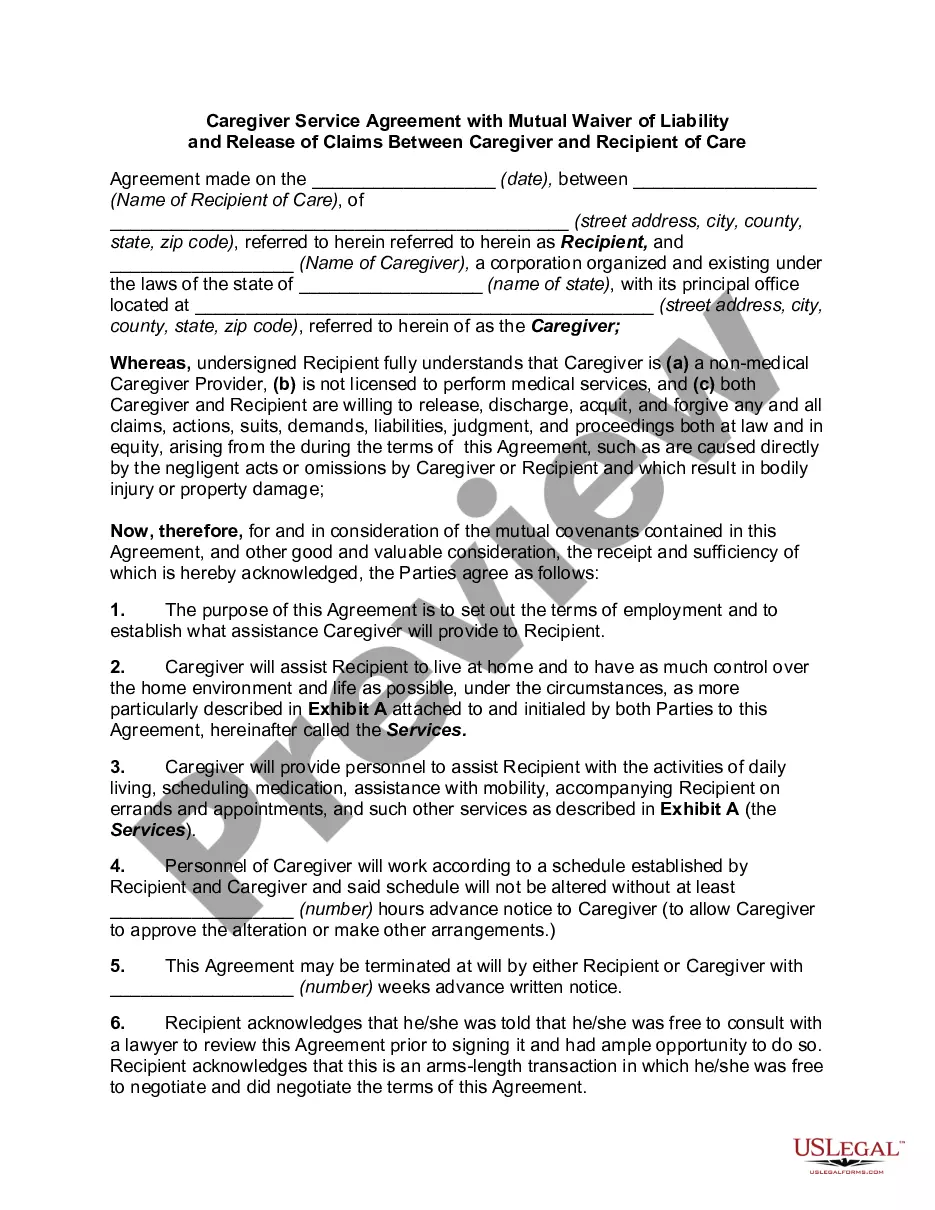
Caregiver Form Application Without Visual Studio In Montgomery
Description


Get your form ready online
Our built-in tools help you complete, sign, share, and store your documents in one place.
Make edits, fill in missing information, and update formatting in US Legal Forms—just like you would in MS Word.
Download a copy, print it, send it by email, or mail it via USPS—whatever works best for your next step.
Sign and collect signatures with our SignNow integration. Send to multiple recipients, set reminders, and more. Go Premium to unlock E-Sign.
If this form requires notarization, complete it online through a secure video call—no need to meet a notary in person or wait for an appointment.
We protect your documents and personal data by following strict security and privacy standards.

Make edits, fill in missing information, and update formatting in US Legal Forms—just like you would in MS Word.

Download a copy, print it, send it by email, or mail it via USPS—whatever works best for your next step.

Sign and collect signatures with our SignNow integration. Send to multiple recipients, set reminders, and more. Go Premium to unlock E-Sign.

If this form requires notarization, complete it online through a secure video call—no need to meet a notary in person or wait for an appointment.

We protect your documents and personal data by following strict security and privacy standards.
Looking for another form?
Form popularity
FAQ
Windows Forms Tutorial: Create Your First Windows Forms C#... Step 1: Create a New Project. Open Visual Studio 2022. Step 2: Name Your Project and Choose the Framework. Step 3: the Required NuGet Package. Step 4: Add the Text Control to Your Form. Step 5: Customize the Text Control. Step 6: Build and Compile.
How to Run a WinForms Application Inside the Web Browser Open Microsoft Visual Studio. Open the .sln project of the provided demos: Right-click on the project name in the 'Solution Explorer' panel and then select 'Add' > 'Existing Item'. In the program.cs file, add the following line:
Create a windows form in c# without visual studio intall c# and the mono compiler. next we need to write the code. This will make a blank window appear. we can compile this with: mcs main.cs -r:System.Windows.Forms.dll -r:System.Drawing.dll. enjoy and have a good day!
After this, there are a number of ways to run a C program in Windows 10. You can either download an IDE like Code::blocks, Eclipse, Netbeans, Dev-C++, etc., Create a new file, type in the C source code you want to run, and then save it with the extension . c. Finally, compile and run the file.
Run WPF application (. NET 5) outside Visual Studio Right click on project. Select Publish. Folder > Next > Folder. I set the location I want to use. Click on Finish button. Click on Show all settings in the new profile.
Open your Windows Forms project in Visual Studio. Navigate to the “Build” menu and select the “Publish” option. The Publish Wizard will appear, guiding you through the publishing process. Choose the publishing location, which can be a web page, network file share, or a local folder.
More videos on YouTube First We open visual Studio. Now click on File>Open. Now Select Project/Solution. The project is now open in your visual Studio window. Now click on Run button. And your Windows Project is now running.