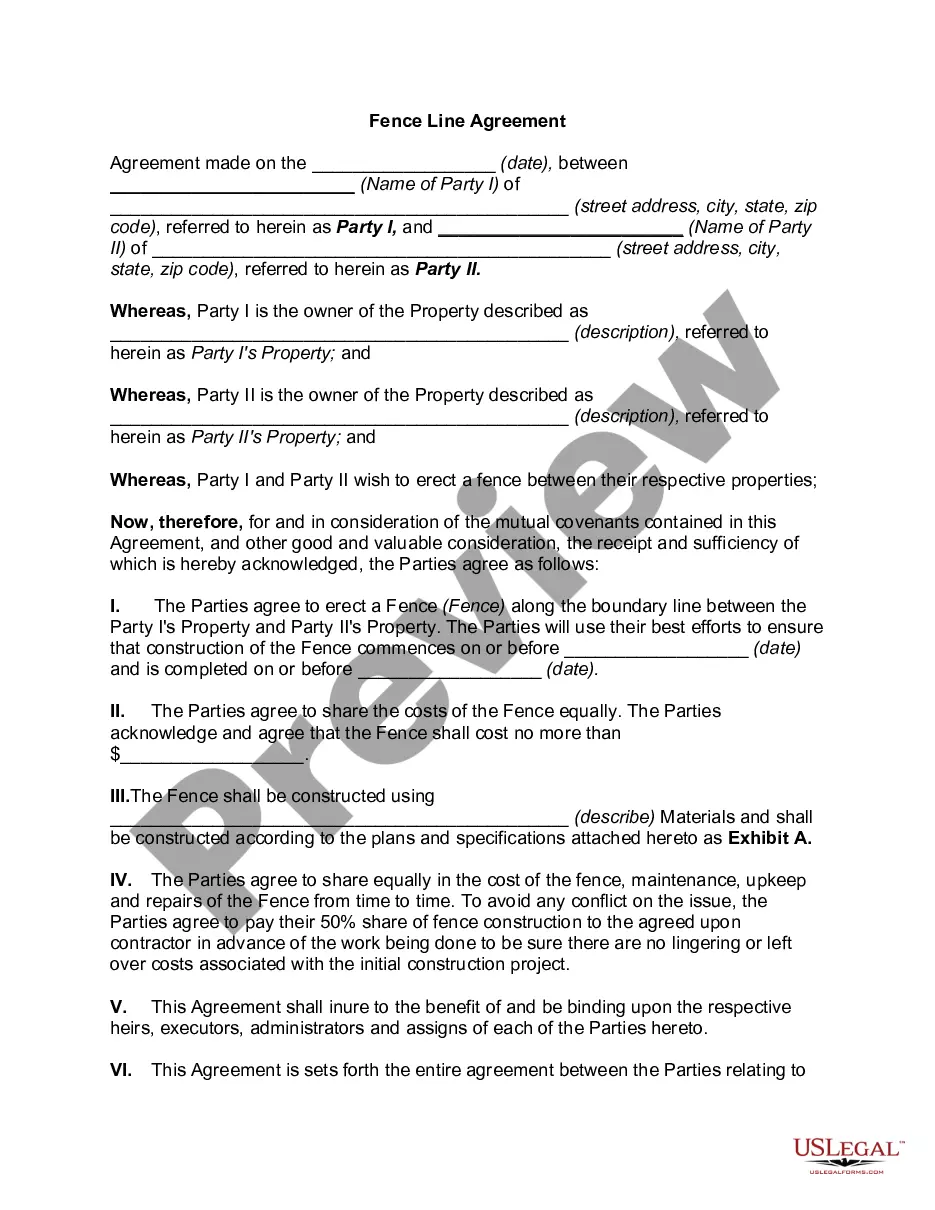
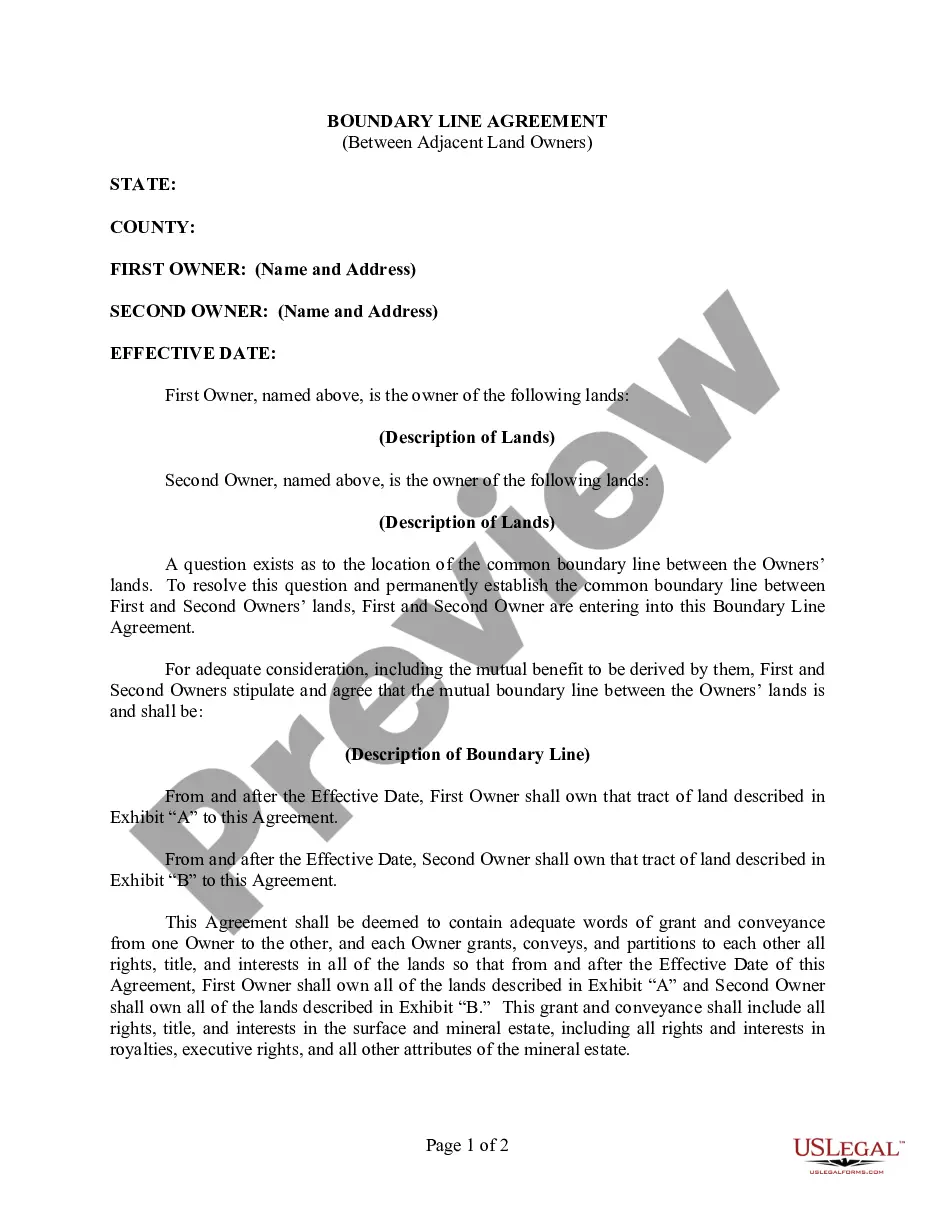
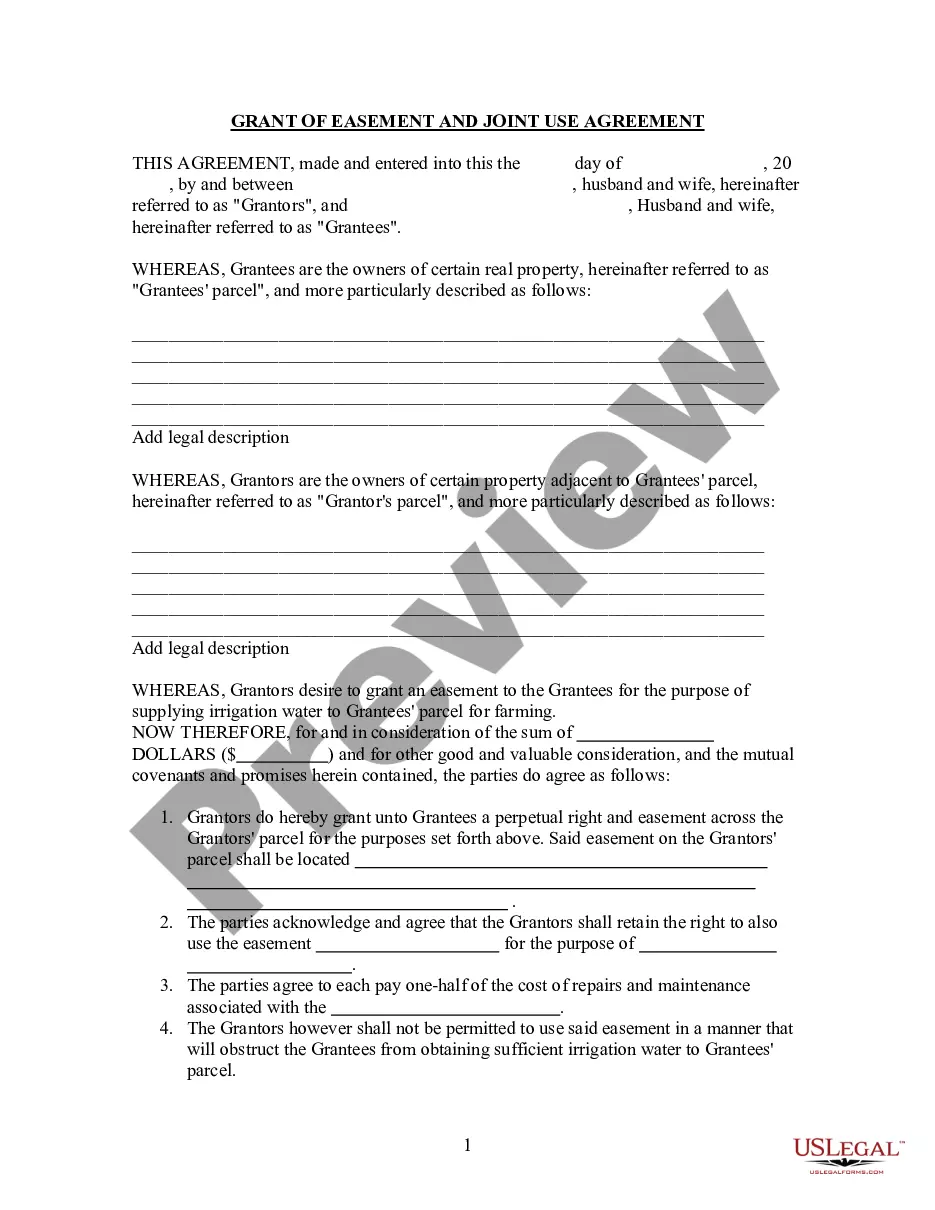
Border Lines For Project In Travis
Description


Get your form ready online
Our built-in tools help you complete, sign, share, and store your documents in one place.
Make edits, fill in missing information, and update formatting in US Legal Forms—just like you would in MS Word.
Download a copy, print it, send it by email, or mail it via USPS—whatever works best for your next step.
Sign and collect signatures with our SignNow integration. Send to multiple recipients, set reminders, and more. Go Premium to unlock E-Sign.
If this form requires notarization, complete it online through a secure video call—no need to meet a notary in person or wait for an appointment.
We protect your documents and personal data by following strict security and privacy standards.

Make edits, fill in missing information, and update formatting in US Legal Forms—just like you would in MS Word.

Download a copy, print it, send it by email, or mail it via USPS—whatever works best for your next step.

Sign and collect signatures with our SignNow integration. Send to multiple recipients, set reminders, and more. Go Premium to unlock E-Sign.

If this form requires notarization, complete it online through a secure video call—no need to meet a notary in person or wait for an appointment.

We protect your documents and personal data by following strict security and privacy standards.
Looking for another form?

Form popularity
FAQ
Running a Container Based Docker Image Locally Download and the Docker Engine. Select an image from Docker Hub. Switch to the travis user: Clone your git repository into the / folder of the image. Manually any dependencies. Manually run your Travis CI build command.
Define environment variables in your . travis. yml in the env key, quoting special characters such as asterisks ( ). One build will be triggered for each line in the env array.
Travis. yml , which is a YAML format text file, to the root directory of the repository. This file specifies the programming language used, the desired building and testing environment (including dependencies which must be installed before the software can be built and tested), and various other parameters.
So you don't get confused. But I just start way at the right side again one inch down. And one inchMoreSo you don't get confused. But I just start way at the right side again one inch down. And one inch down. And now I'm going to line those two up together drag across now I have a finished border.
The engineering design process is a seven-step process that begins with defining the problem. Step 1: Define. In this step, students formulate what they think about the problem. Step 3: Imagine. Step 4: Plan. Step 5: Prototype. Step 6: Test. Step 7: Improve. Bonus Step: Communicate.
Project Design Examples For example, a Gantt chart shows the project roadmap and timelines if you are working on a software development project. The Gantt chart below shows the product roadmap and timeline for the project. ClickUp's Gantt chart view for product teams shows project roadmaps and timelines.
Steps in the project design process Define goals. Project goals should be clear and achievable, never exceeding team members' abilities. Establish outcomes. Identify risks. Create a project strategy. Set a budget. Prepare a contingency plan. Track deliverables.
How to Create a Software Design Document Define Scope and Objectives. Adopt a Standardized Format. Include a High-level Architectural Overview. Document Design Patterns and Decisions. Use Diagrams and Visuals Effectively. Implement Version Control for the Software Design Document. Encourage Collaboration Among Team Members.
A pattern designed to run lengthwise along the edge of the fabric or wallpaper. Example(s) of Border Design.
For effective project design, teams must follow these seven steps: Define goals. Project goals should be clear and achievable, never exceeding team members' abilities. Establish outcomes. Identify risks. Create a project strategy. Set a budget. Prepare a contingency plan. Track deliverables.