Consignment Agreement In Oracle Fusion In Travis
Description


Get your form ready online
Our built-in tools help you complete, sign, share, and store your documents in one place.
Make edits, fill in missing information, and update formatting in US Legal Forms—just like you would in MS Word.
Download a copy, print it, send it by email, or mail it via USPS—whatever works best for your next step.
Sign and collect signatures with our SignNow integration. Send to multiple recipients, set reminders, and more. Go Premium to unlock E-Sign.
If this form requires notarization, complete it online through a secure video call—no need to meet a notary in person or wait for an appointment.
We protect your documents and personal data by following strict security and privacy standards.

Make edits, fill in missing information, and update formatting in US Legal Forms—just like you would in MS Word.

Download a copy, print it, send it by email, or mail it via USPS—whatever works best for your next step.

Sign and collect signatures with our SignNow integration. Send to multiple recipients, set reminders, and more. Go Premium to unlock E-Sign.

If this form requires notarization, complete it online through a secure video call—no need to meet a notary in person or wait for an appointment.

We protect your documents and personal data by following strict security and privacy standards.
Looking for another form?


Form popularity
FAQ
In consignment inventory, the supplier retains ownership of the goods until they are sold by the retailer, who pays the supplier only after the sale. In vendor-managed inventory (VMI), the supplier manages and replenishes the retailer's inventory levels based on agreed-upon metrics.
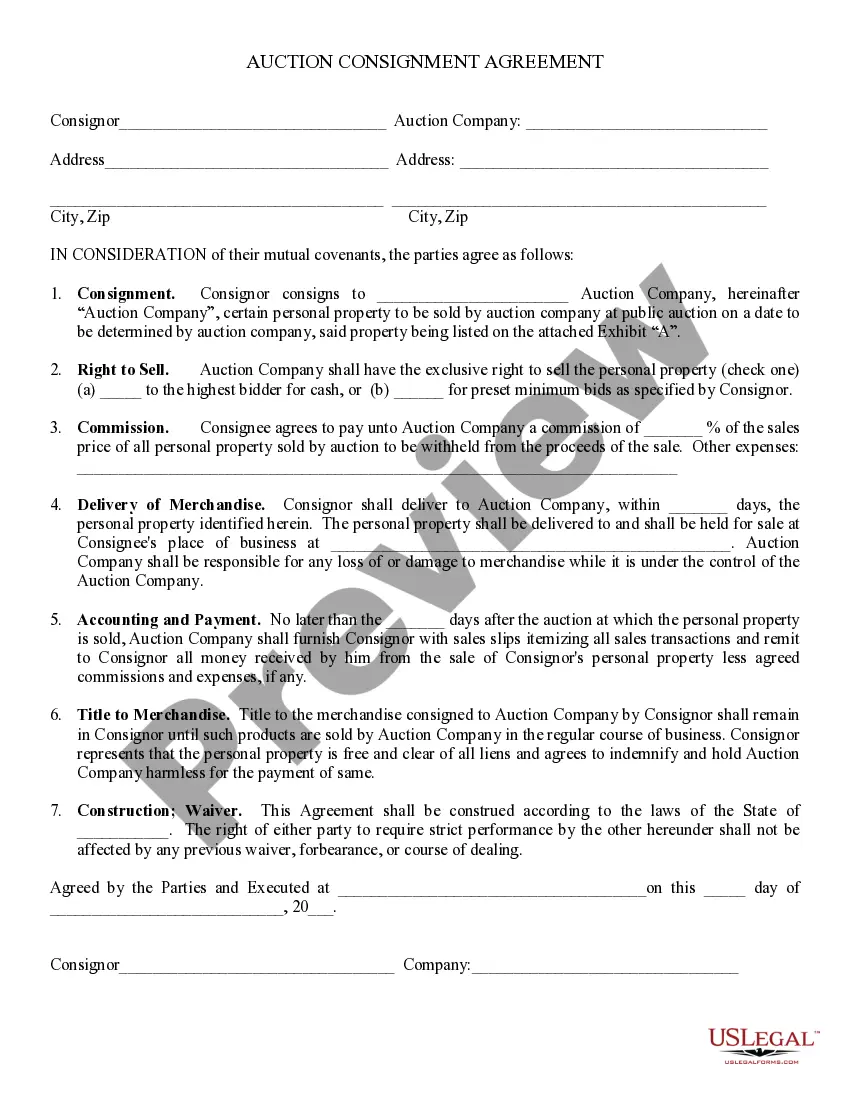
Following the auction consignment company's receipt of your items, they will begin to photograph and catalog them. With your items organized, the marketing process can begin. Item Viewing: Through the marketing efforts of the auction consignment company, interest will grow in your items.
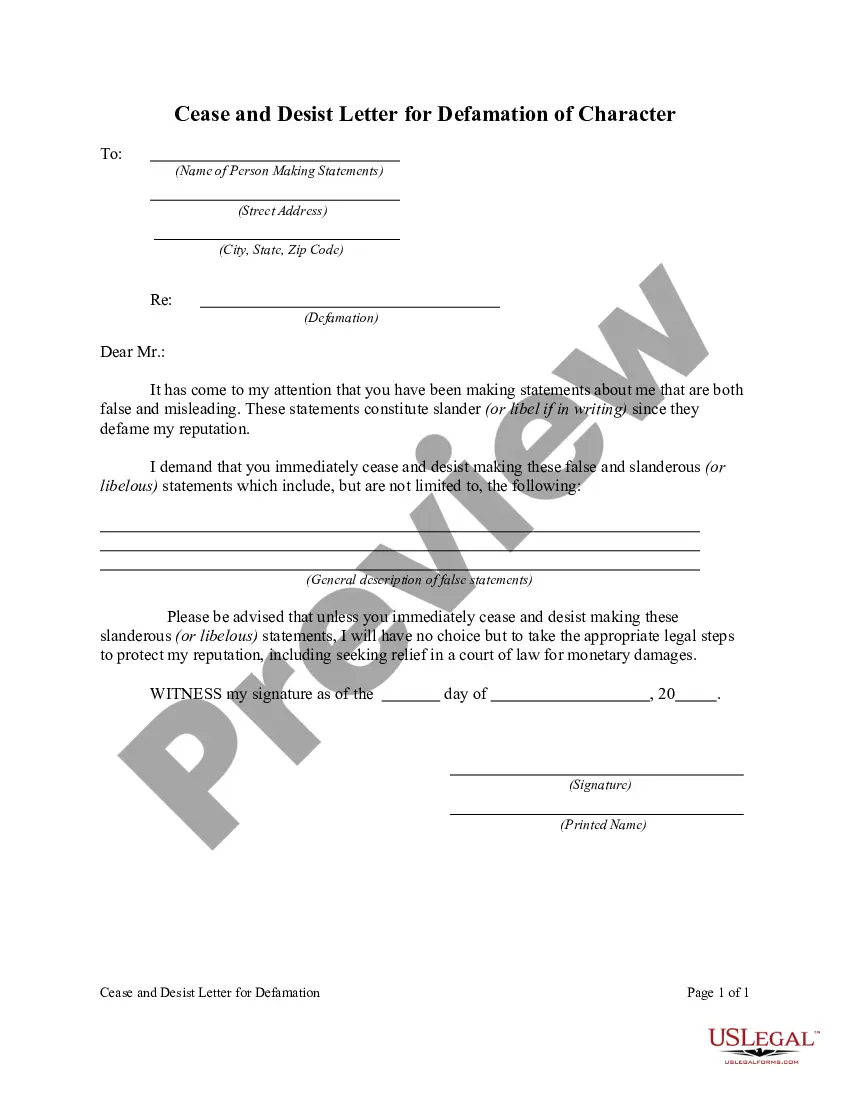
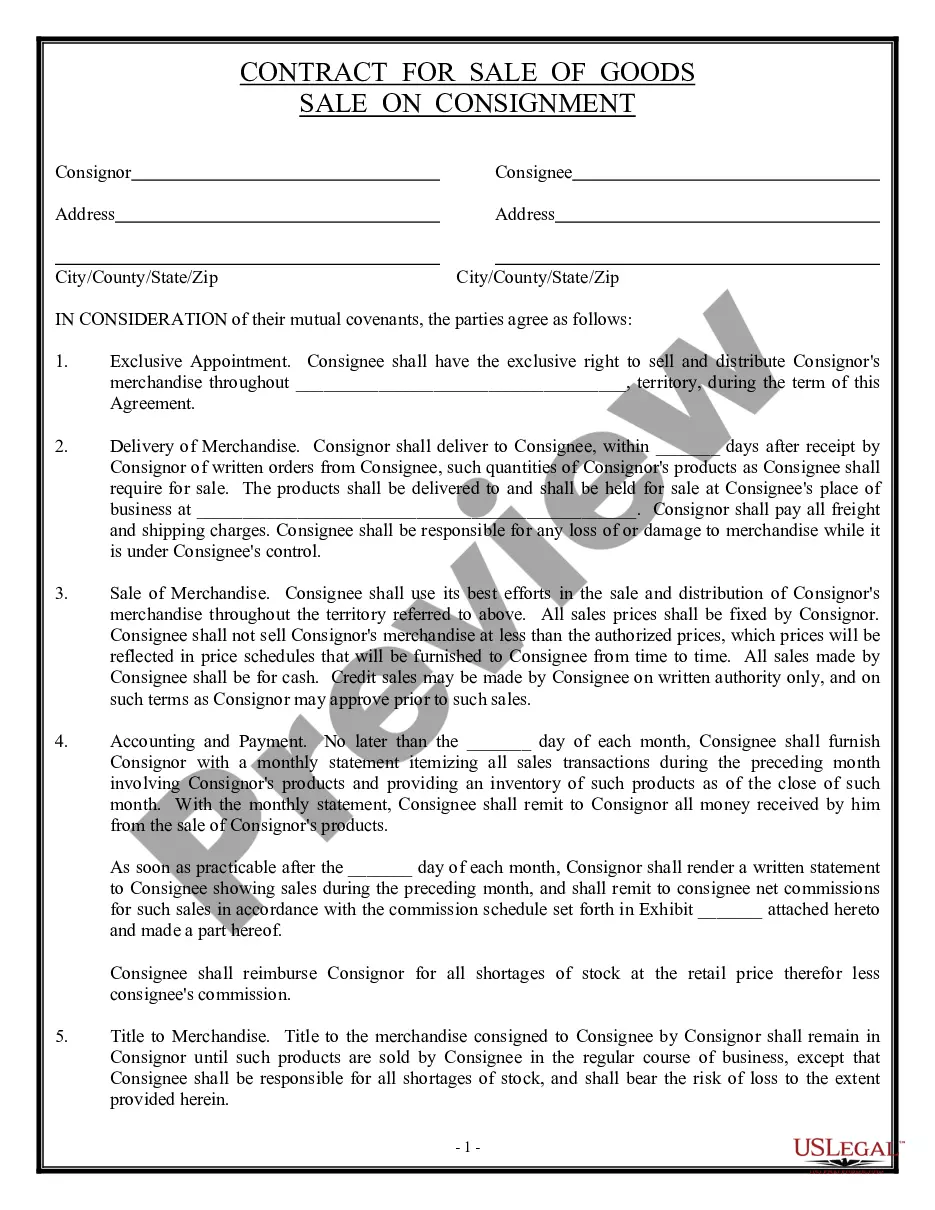
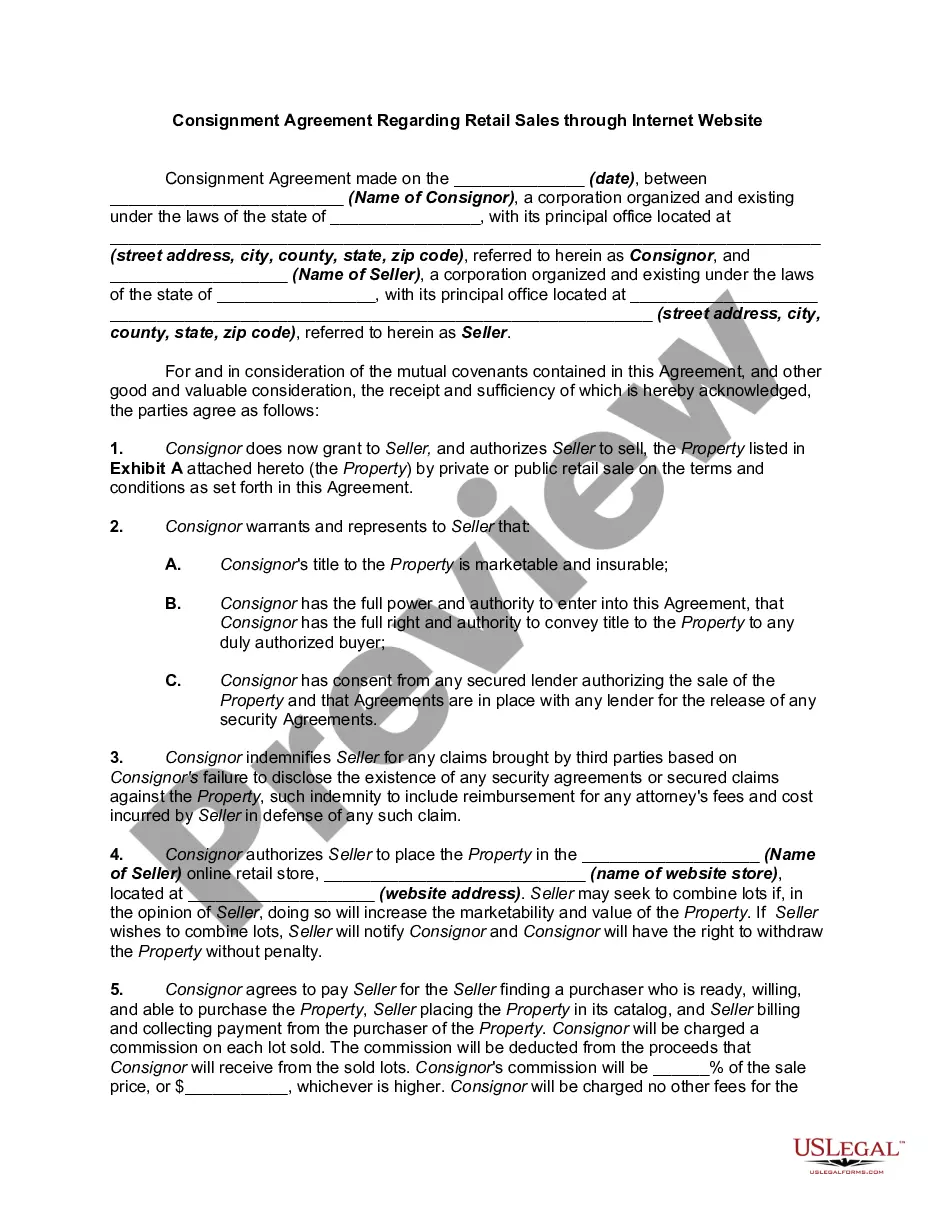
In a consignment agreement, a consignor supplies goods to a consignee, who sells them on the consignor's behalf. The consignee earns a commission from each sale and sends the remaining sales revenue to the consignor. The consignor retains ownership of the goods until they are sold.
Consigned inventory refers to items that are in the possession of one party, but remain the property of another party by mutual agreement. The process of consigned inventory follows steps between the buyer and seller.
The following is an overview of the item import process: Download the item import template file from the Oracle Fusion Cloud SCM File-Based Data Import (FBDI) for SCM. Enter data in tabs within the item import template file. Generate CSV (ZIP file). Upload to Oracle WebCenter Content.
Importing Users Download these sample files as a starting point. Extract the compressed file and then open the Users. csv file. Optional. Review and then delete any demo data in the Users. Create an import file using the Users. Save your file in UTF-8 format.
How You Import Customer Data Navigate to the File-Based Data Import for Financials guide. In the Table of Contents, click Customer Data Model. Click Customer Import. In the File Links section, click the link to the Excel template.
To import data: Click Tools > Import Management. On the Manage Imports page, click the Create Import Activity button. On the Enter Import Options page provide values for each field as shown in the following table. Optionally, to set additional import configurations, click the Advanced Options section. Click Next.