Tenant With Remove With Microsoft Account
Description


Get your form ready online
Our built-in tools help you complete, sign, share, and store your documents in one place.
Make edits, fill in missing information, and update formatting in US Legal Forms—just like you would in MS Word.
Download a copy, print it, send it by email, or mail it via USPS—whatever works best for your next step.
Sign and collect signatures with our SignNow integration. Send to multiple recipients, set reminders, and more. Go Premium to unlock E-Sign.
If this form requires notarization, complete it online through a secure video call—no need to meet a notary in person or wait for an appointment.
We protect your documents and personal data by following strict security and privacy standards.

Make edits, fill in missing information, and update formatting in US Legal Forms—just like you would in MS Word.

Download a copy, print it, send it by email, or mail it via USPS—whatever works best for your next step.

Sign and collect signatures with our SignNow integration. Send to multiple recipients, set reminders, and more. Go Premium to unlock E-Sign.

If this form requires notarization, complete it online through a secure video call—no need to meet a notary in person or wait for an appointment.

We protect your documents and personal data by following strict security and privacy standards.
Looking for another form?
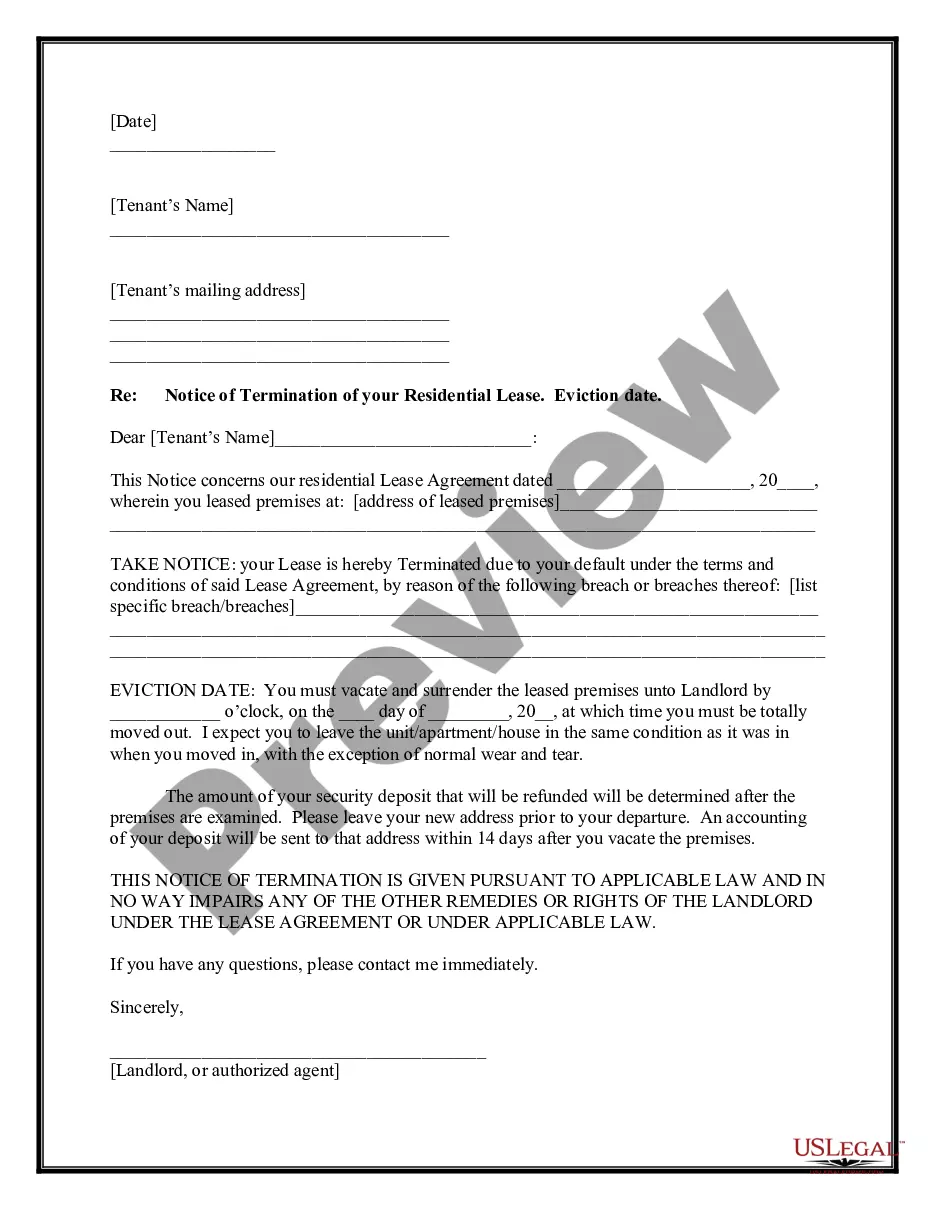
How to fill out New York Letter From Tenant To Landlord With Demand That Landlord Remove Garbage And Vermin From Premises?
Legal document management can be perplexing, even for the most experienced professionals.
When you are seeking a Tenant With Remove With Microsoft Account and lack the time to dedicate to finding the correct and current version, the processes can be overwhelming.
US Legal Forms meets any needs you may have, ranging from personal to business documents, all in one place.
Utilize advanced tools to complete and manage your Tenant With Remove With Microsoft Account.
Here are the steps to take after downloading the form you need: Confirm it is the correct form by previewing it and examining its details. Ensure that the sample is recognized in your state or county. Select Buy Now when you are ready. Choose a subscription plan. Locate the format you need, and Download, complete, eSign, print, and deliver your document. Enjoy the US Legal Forms online library, backed by 25 years of experience and dependability. Transform your daily document management into a seamless and user-friendly process today.
- Access a resource center of articles, guides, and manuals relevant to your situation and needs.
- Save time and effort searching for the documents you require, and use US Legal Forms’ advanced search and Preview tool to find Tenant With Remove With Microsoft Account and obtain it.
- If you have a monthly subscription, Log In to your US Legal Forms account, search for the form, and retrieve it.
- Check your My documents tab to review the documents you have previously downloaded and manage your folders as desired.
- If it’s your first time with US Legal Forms, create a complimentary account and receive unlimited access to all benefits of the library.
- A robust online form library can be a game-changer for anyone wanting to handle these matters effectively.
- US Legal Forms is a frontrunner in online legal forms, with over 85,000 state-specific legal forms available to you at any time.
- With US Legal Forms, you can access state- or county-specific legal and business forms.
Form popularity
FAQ
Taking over a Microsoft tenant involves gaining administrative access to the tenant you want to manage. First, ensure you have the necessary permissions from the current administrator. Next, log into your Microsoft account and follow the steps to change the admin settings. Using US Legal Forms can help you draft any required documentation to facilitate this process smoothly.
To remove a tenant with your Microsoft account, start by accessing the Microsoft 365 admin center. Here, navigate to the 'Active users' section and locate the tenant you want to remove. After selecting the tenant, choose the option to delete. Following these steps ensures a smooth removal process, allowing you to manage your Microsoft account effectively.
Your Microsoft 365 tenant is the set of services assigned to your organization. Typically, this tenant is associated with one or more of your public DNS domain names and acts as a central and isolated container for different subscriptions and the licenses within them that you assign to user accounts.
Browse to Identity > Overview > Properties. Scroll down to the Tenant ID section and you can find your tenant ID in the box.
To create a new tenant Sign in to the Azure portal. From the Azure portal menu, select Microsoft Entra ID. On the overview page, select Manage tenants. Select Create. On the Basics tab, select the type of tenant you want to create, either Microsoft Entra ID or Microsoft Entra ID (B2C).
On the Overview page, select Manage tenants. On the Manage tenants page, select (by check marking) the tenant you want to delete, and then, at the top of the page, select the Delete button.
Create an Office 365 trial tenant Set up your account. Enter the email address that you want to configure with Office 365. Click Next. ... Tell us about yourself. Fill in the information. Click Next. ... Create your business identity. Fill in the username and domain name. ... You're all set. That's it.