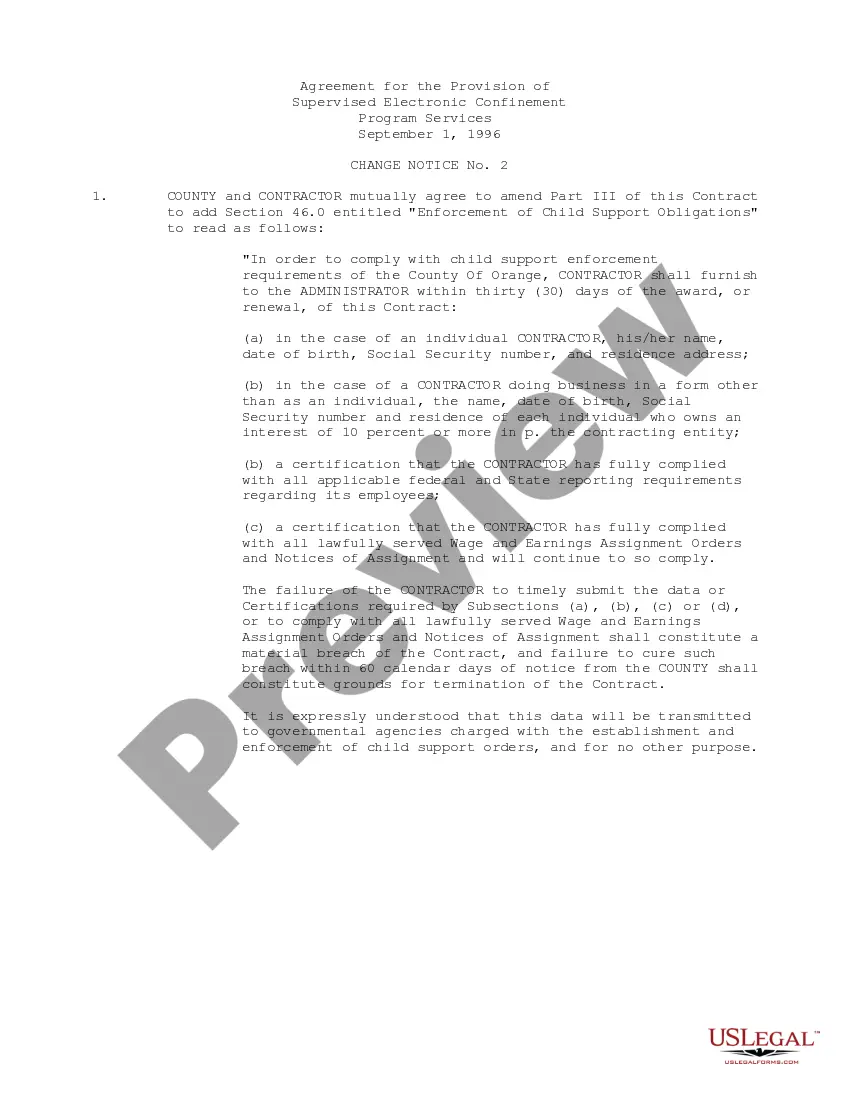
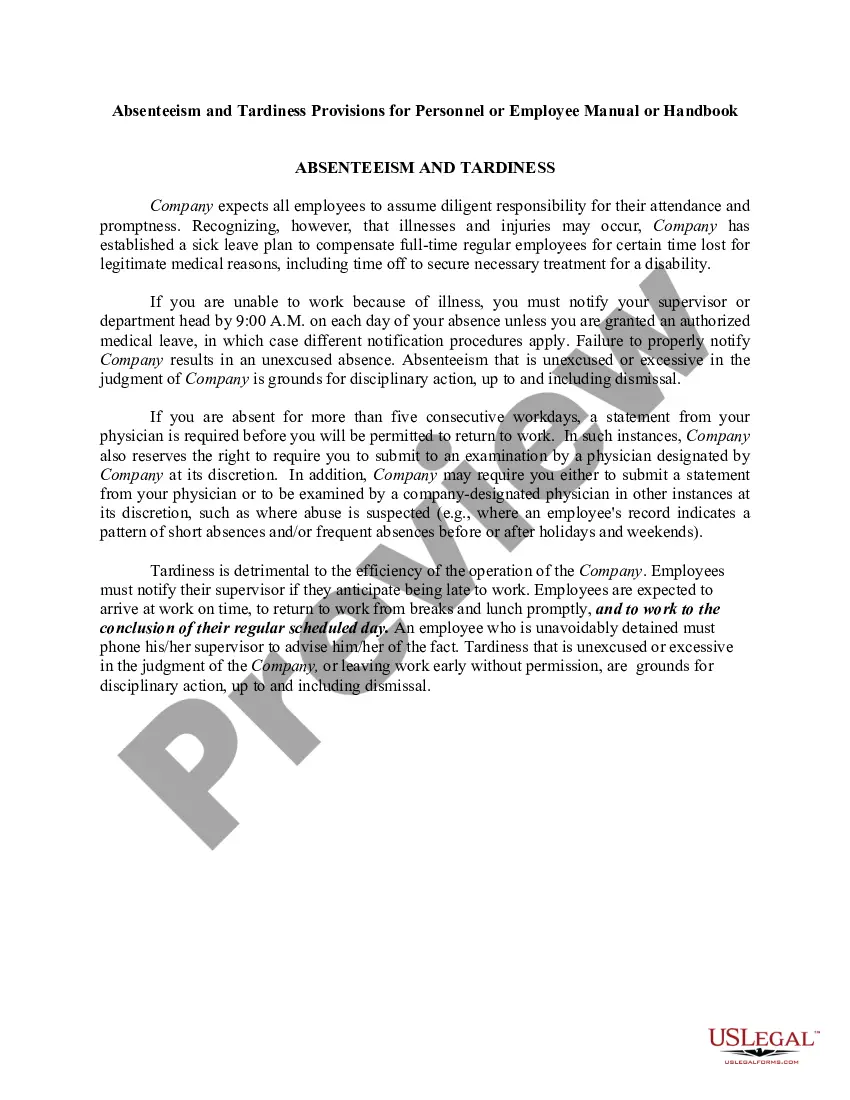
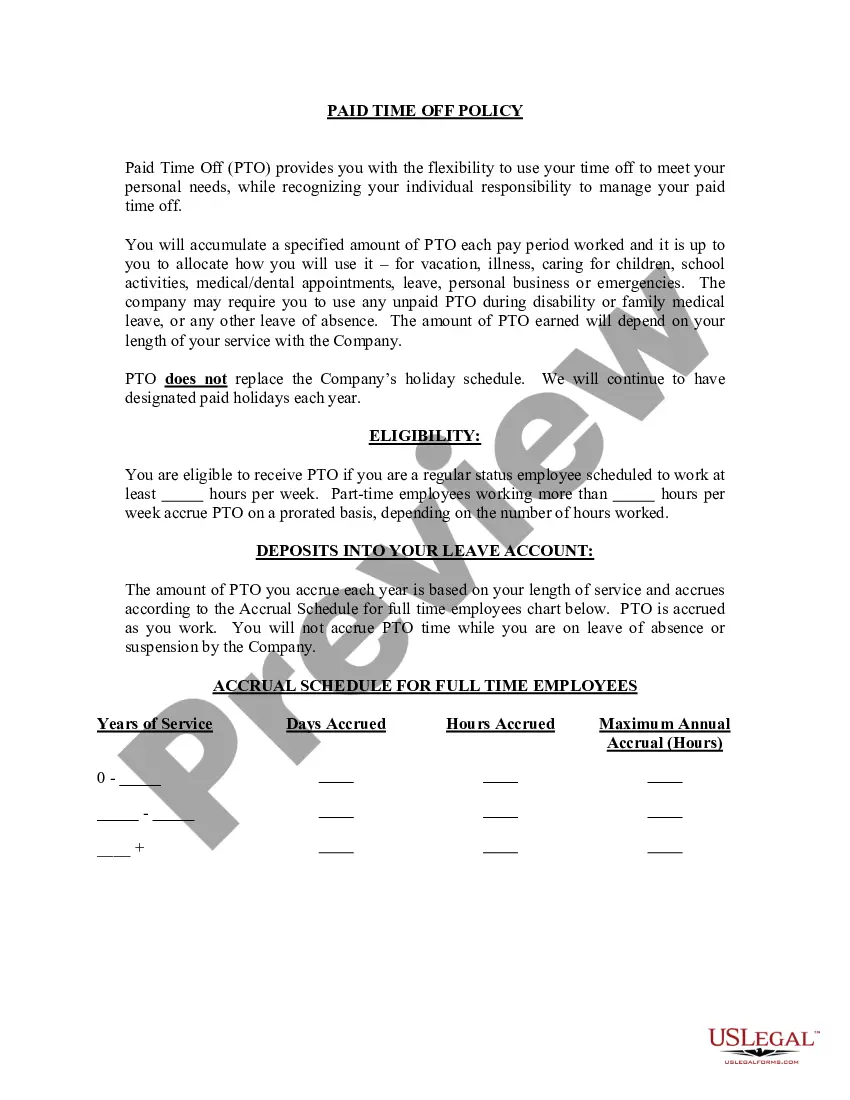
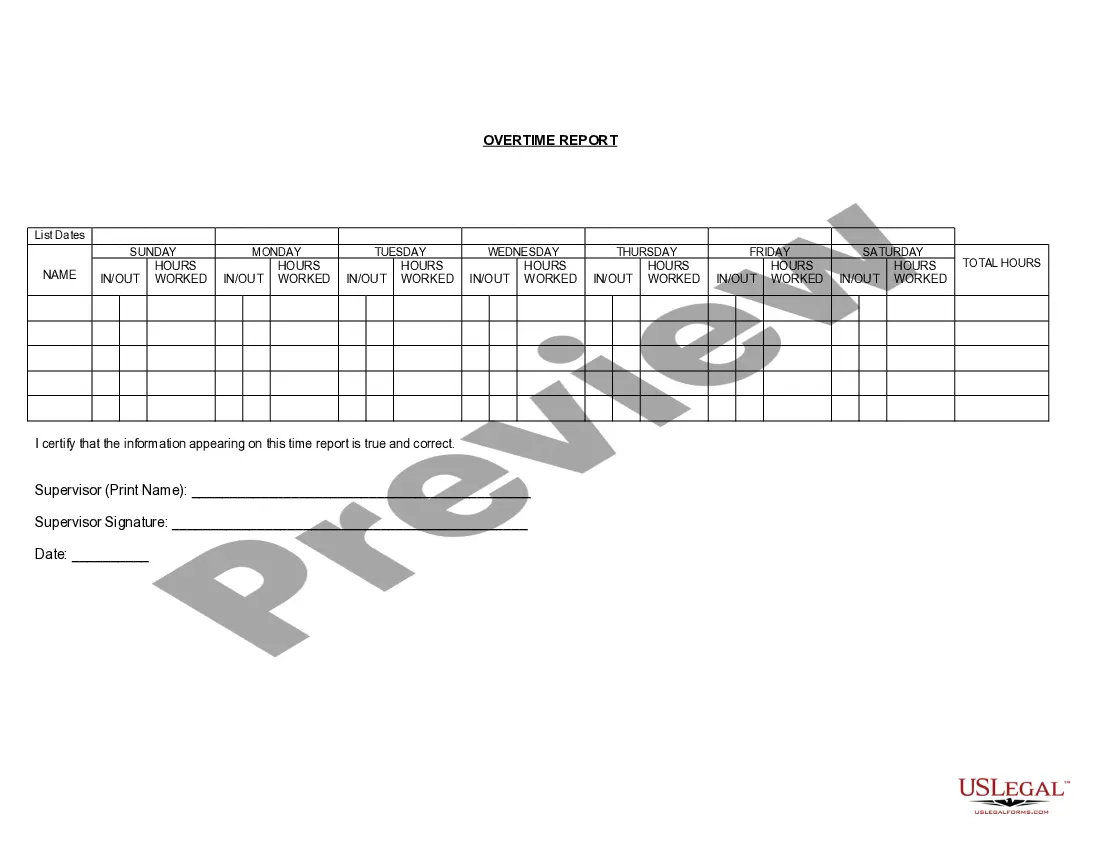
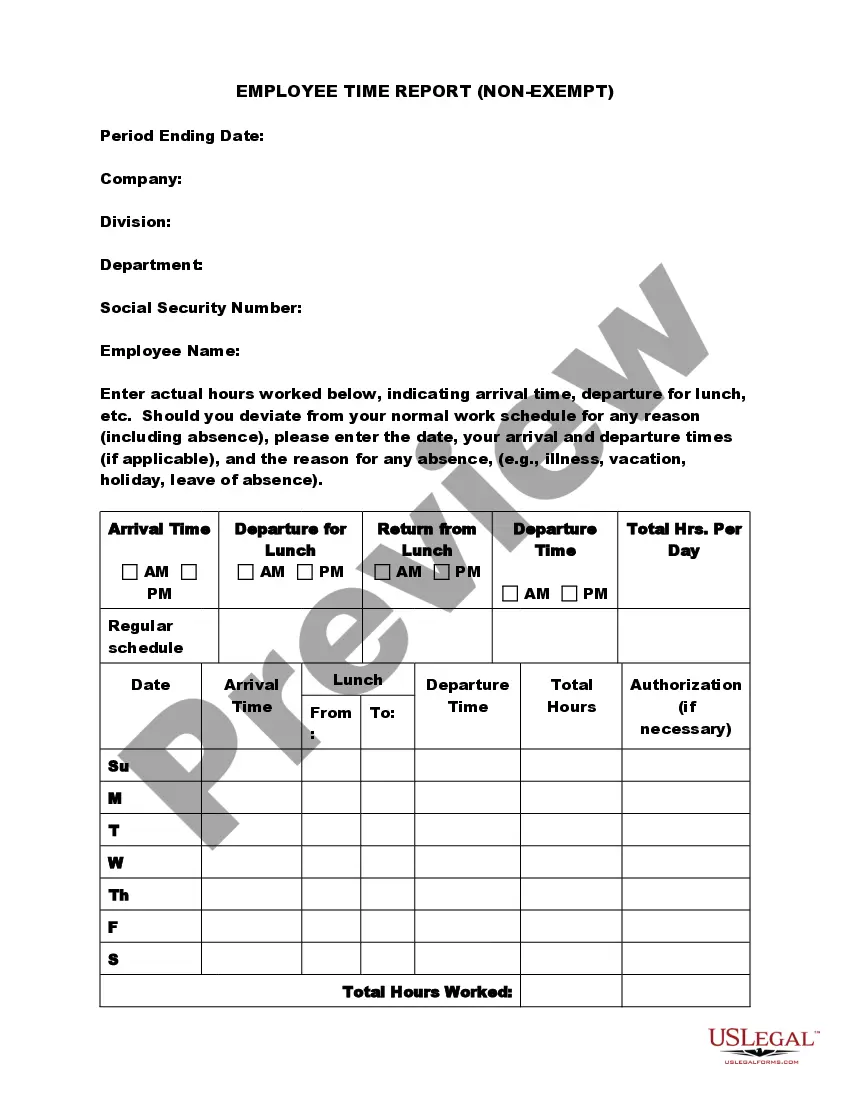
Information regarding "Off Clock" pitfalls & Policies to combat claims regarding time sheets and time cards.
Oregon Monitored Time Info and Pamphlet - Off Clock Pitfalls
Instant download
Description
Free preview


How to fill out Monitored Time Info And Pamphlet - Off Clock Pitfalls?
You can devote several hours online looking for the legal document template that complies with the federal and state regulations you need.
US Legal Forms offers thousands of legal forms that are evaluated by experts.
You can conveniently download or print the Oregon Monitored Time Information and Brochure - Off Clock Pitfalls from the service.
- If you already possess a US Legal Forms account, you can sign in and click the Download button.
- After that, you can complete, modify, print, or sign the Oregon Monitored Time Information and Brochure - Off Clock Pitfalls.
- Every legal document template you purchase is yours forever.
- To obtain another copy of any purchased document, go to the My documents tab and click the corresponding button.
- If you are using the US Legal Forms website for the first time, follow the simple instructions below.
- First, ensure that you have selected the correct document template for the region/area of your choice.
Form popularity
FAQ
While 32 hours a week is often considered part-time, some employers in Oregon may categorize it as full time. It's essential to clarify the definition of full time directly with your employer. This distinction is crucial to stay informed about your rights and obligations, especially when navigating the Oregon Monitored Time Info and Pamphlet - Off Clock Pitfalls. Understanding these terms can help you make informed decisions about your work hours and benefits.
In Oregon, full-time employment typically consists of 40 hours per week. However, it's important to understand the specific requirements of your employer, as some companies may designate full time differently. This information is essential, particularly when reviewing the Oregon Monitored Time Info and Pamphlet - Off Clock Pitfalls. Knowing the full-time guidelines helps you avoid pitfalls related to overtime and wage calculations.
In Oregon, full-time employment is generally recognized as working 30 or more hours per week. This classification can vary by employer, but understanding the state's definition helps you know your rights and benefits. If you're navigating employment matters, the Oregon Monitored Time Info and Pamphlet - Off Clock Pitfalls serves as a vital guide for ensuring you get the support you deserve.
Predictive scheduling rules in Oregon require employers to provide schedules in advance, compensating employees for last-minute changes. These rules also apply to various industries, supporting a healthier work-life balance. By following Oregon Monitored Time Info and Pamphlet - Off Clock Pitfalls, workers and employers can build a collaborative environment while ensuring compliance with state regulations.
The predictive scheduling law in Oregon focuses on a structured and fair approach to work schedules. The law requires employers to provide notice of shifts and make good-faith efforts to accommodate schedule changes. Understanding these provisions can help you navigate the workplace, making the Oregon Monitored Time Info and Pamphlet - Off Clock Pitfalls an essential resource for all workers.
Employers in Oregon must provide their employees with a written schedule at least seven days in advance. However, if changes occur, the employer must notify the employee as soon as possible and ideally before the schedule's start date. This transparency supports workers' rights and aligns with Oregon Monitored Time Info and Pamphlet - Off Clock Pitfalls, promoting harmony between employers and employees.
Predictive scheduling is a legal requirement that mandates employers to provide workers with advance notice of their work schedules. In Oregon, this process ensures that employees have time to plan their personal and family obligations effectively. By implementing predictive scheduling, companies create a fair workplace that respects employees' time, which ultimately ties in with Oregon Monitored Time Info and Pamphlet - Off Clock Pitfalls.
Yes, time clock rounding is legal in Oregon, provided it is done in a way that complies with state laws. Oregon requires that rounding be applied consistently so that employees are not worked short of their entitled hours. This allows for flexibility in payroll calculations without adversely affecting worker compensation. For comprehensive guidance, utilize the Oregon Monitored Time Info and Pamphlet - Off Clock Pitfalls to navigate these regulations effectively.
The rules for clock in rounding stipulate that employers can round time worked to the nearest increment, generally to the nearest quarter hour. This rounding must be applied consistently across all employees to avoid unfair practices. Employers should document their rounding policies and ensure that they comply with state-specific laws. For more detailed information, consider reviewing the Oregon Monitored Time Info and Pamphlet - Off Clock Pitfalls.
Yes, quarter hour rounding is legal in many jurisdictions, including Oregon, when done fairly. This means that if an employee clocks in at any time between the 1st and 7th minute, their time can be rounded down to the nearest quarter hour. However, rounding must average out to ensure that employees are not disadvantaged. Using Oregon Monitored Time Info and Pamphlet - Off Clock Pitfalls can provide insights into implementing these practices correctly.