Change Owner Name Windows 10
Description


Get your form ready online
Our built-in tools help you complete, sign, share, and store your documents in one place.
Make edits, fill in missing information, and update formatting in US Legal Forms—just like you would in MS Word.
Download a copy, print it, send it by email, or mail it via USPS—whatever works best for your next step.
Sign and collect signatures with our SignNow integration. Send to multiple recipients, set reminders, and more. Go Premium to unlock E-Sign.
If this form requires notarization, complete it online through a secure video call—no need to meet a notary in person or wait for an appointment.
We protect your documents and personal data by following strict security and privacy standards.

Make edits, fill in missing information, and update formatting in US Legal Forms—just like you would in MS Word.

Download a copy, print it, send it by email, or mail it via USPS—whatever works best for your next step.

Sign and collect signatures with our SignNow integration. Send to multiple recipients, set reminders, and more. Go Premium to unlock E-Sign.

If this form requires notarization, complete it online through a secure video call—no need to meet a notary in person or wait for an appointment.

We protect your documents and personal data by following strict security and privacy standards.
Looking for another form?
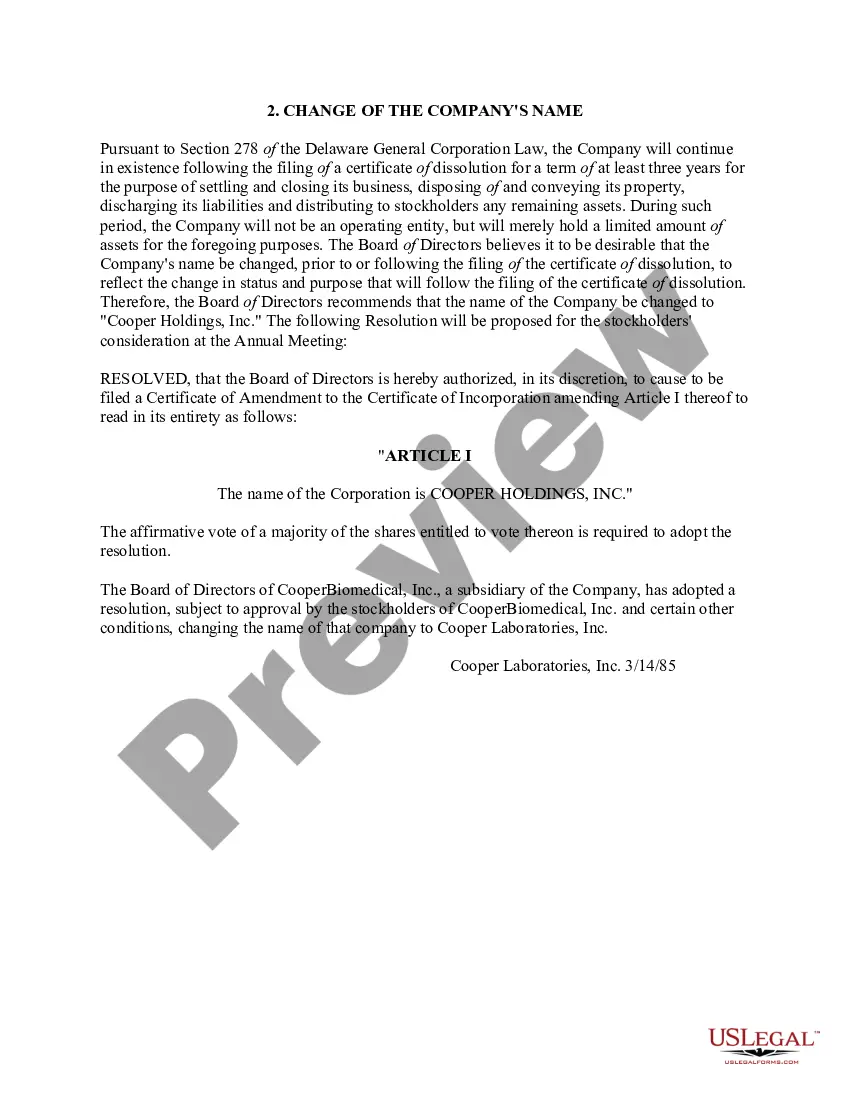
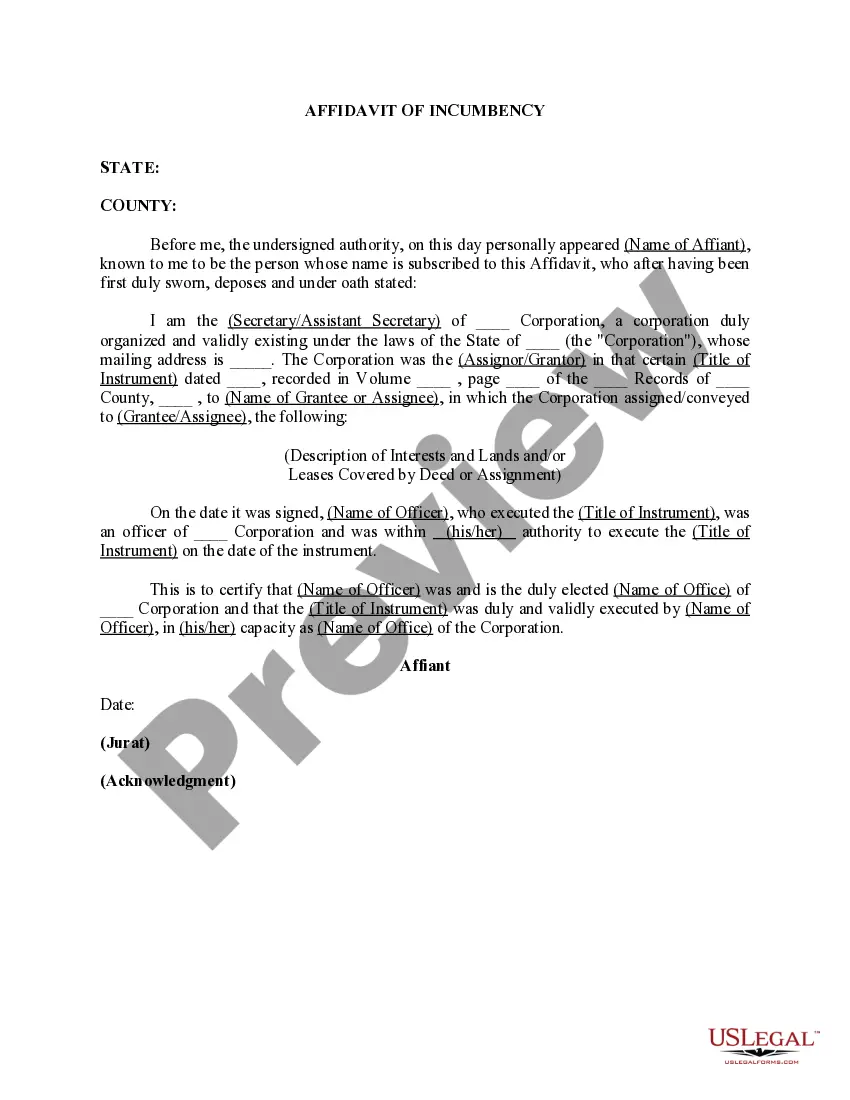
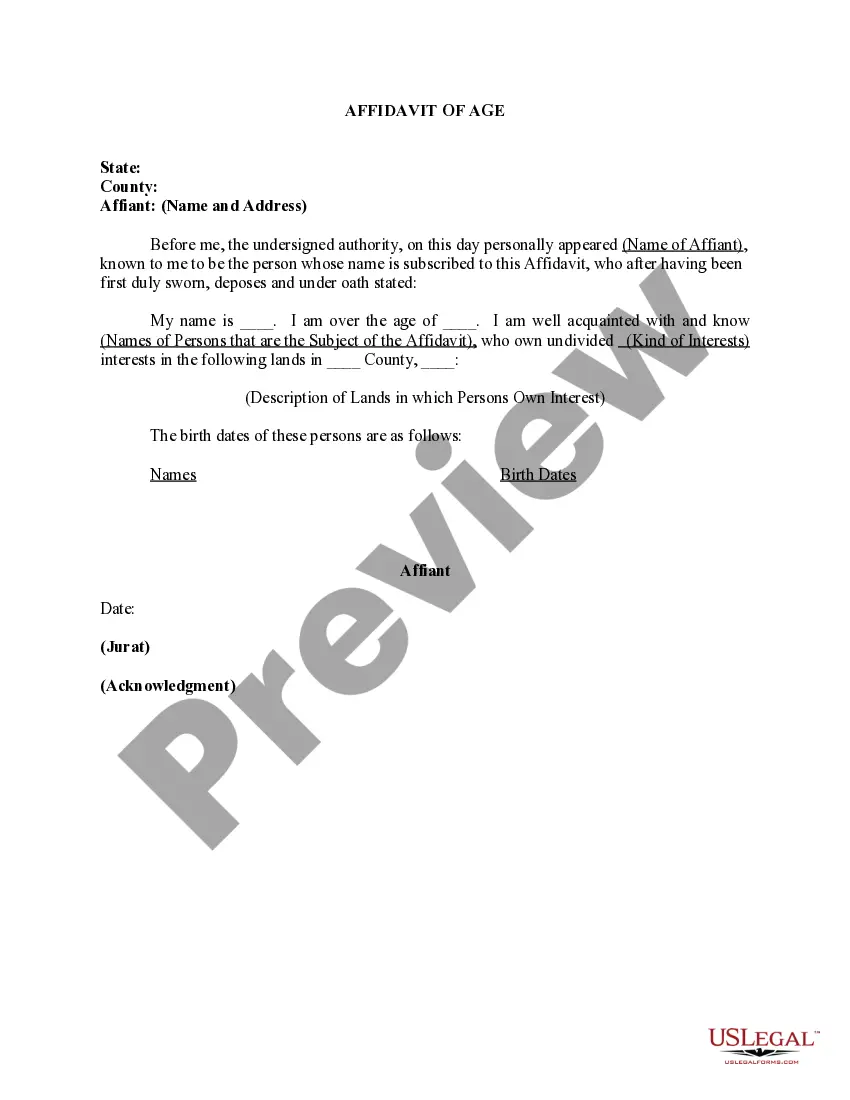
How to fill out Affidavit Of Company Name Change?
The Change Owner Name Windows 10 visible on this page is a reusable official template created by professional attorneys in accordance with federal and local laws and regulations.
For over 25 years, US Legal Forms has supplied individuals, enterprises, and lawyers with more than 85,000 validated, state-specific documents for any business and personal situation. It’s the quickest, clearest, and most dependable method to acquire the paperwork you require, as the service ensures the utmost level of data security and anti-malware safeguards.
Select the format you desire for your Change Owner Name Windows 10 (PDF, DOCX, RTF) and download the example onto your device.
- Search for the document you need and examine it.
- Look through the file you searched and preview it or check the form description to ensure it meets your requirements. If it does not, use the search function to find the correct one. Click Buy Now once you have found the template you require.
- Register and Log In.
- Select the pricing plan that fits you and create an account. Utilize PayPal or a credit card for a swift payment. If you already possess an account, Log In and verify your subscription to proceed.
- Obtain the fillable template.
Form popularity
FAQ
To change the computer owner name in Windows 10, go to Settings, then Accounts, and select 'Your info.' Click on 'Manage my Microsoft account' if you use a Microsoft account, or change it directly if using a local account. Following these steps helps you effectively change owner name Windows 10, ensuring your device reflects the correct user identity.
Preparing Windows 10 for a new owner involves several key steps. First, back up important files and remove personal data, ensuring the new user starts fresh. Next, reset the PC to its factory settings, which clears all user information and changes the owner name Windows 10. This process provides a clean slate, making the transition seamless for the new owner.
To rename a PC owner in Windows 10, start by accessing the Control Panel. Navigate to 'User Accounts' and select 'Change your account name.' Enter the new name and click 'Change Name' to finalize the process. This step is essential when you want to change owner name Windows 10, ensuring that the PC accurately reflects the current user.
Change Windows 10 User Folder Name In Registry Open the Command Prompt in administrator mode. Type wmic useraccount list full and press enter. ... Rename your existing account by typing CD c:\users, then rename [YourOldAccountName] [NewAccountName]. ... Open Regedit, and navigate to HKEY_LOCAL_MACHINE\SOFTWARE\Microsoft\Windows.
How to Change Registered Owner and Organization Name in Windows 10 Open the Registry Editor. Press the Start button and type ?Registry Editor? click the top result to open it. Navigate to the organization name entry and modify it. ... Check your registered owner name with the ?About? tool.
Click the System icon to view System settings. In the Computer name, domain, and workgroup settings section, click Change Settings. At the System Properties window, click Change. You can then type the new name for your computer in the Computer name field.
Change Windows 10 Registered Owner and Organization - YouTube YouTube Start of suggested clip End of suggested clip Up you want to click on hkey local machine expand that go into software. Scroll all the way down inMoreUp you want to click on hkey local machine expand that go into software. Scroll all the way down in software to microsoft expand it now you're looking for windows. Nt. Under that current version.
Change Windows 10 Registered Owner and Organization - YouTube YouTube Start of suggested clip End of suggested clip Up you want to click on hkey local machine expand that go into software. Scroll all the way down inMoreUp you want to click on hkey local machine expand that go into software. Scroll all the way down in software to microsoft expand it now you're looking for windows. Nt. Under that current version.