Select The Appropriate Titles For Text 1
Description


Get your form ready online
Our built-in tools help you complete, sign, share, and store your documents in one place.
Make edits, fill in missing information, and update formatting in US Legal Forms—just like you would in MS Word.
Download a copy, print it, send it by email, or mail it via USPS—whatever works best for your next step.
Sign and collect signatures with our SignNow integration. Send to multiple recipients, set reminders, and more. Go Premium to unlock E-Sign.
If this form requires notarization, complete it online through a secure video call—no need to meet a notary in person or wait for an appointment.
We protect your documents and personal data by following strict security and privacy standards.

Make edits, fill in missing information, and update formatting in US Legal Forms—just like you would in MS Word.

Download a copy, print it, send it by email, or mail it via USPS—whatever works best for your next step.

Sign and collect signatures with our SignNow integration. Send to multiple recipients, set reminders, and more. Go Premium to unlock E-Sign.

If this form requires notarization, complete it online through a secure video call—no need to meet a notary in person or wait for an appointment.

We protect your documents and personal data by following strict security and privacy standards.
Looking for another form?
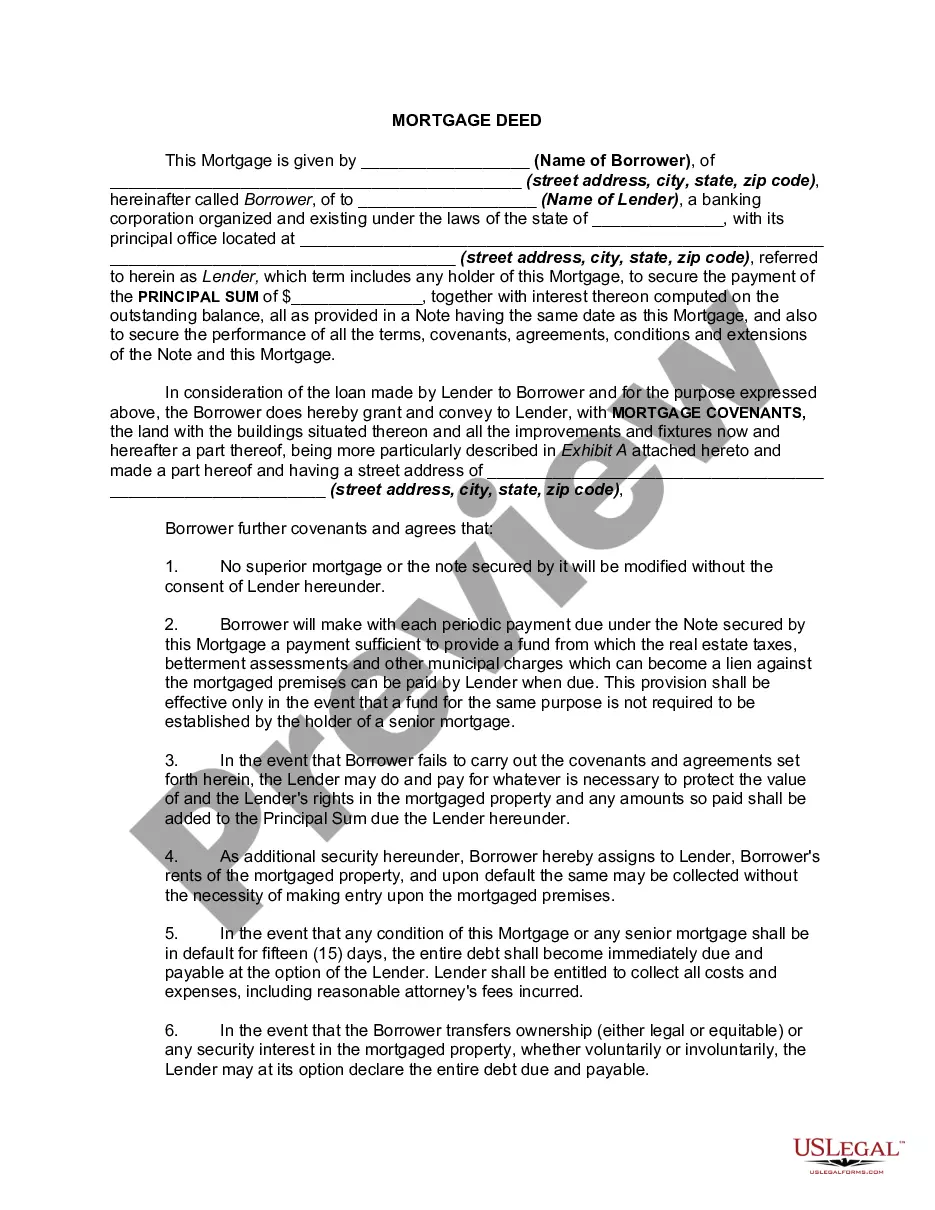
How to fill out Mortgage Note?
- Log in to your US Legal Forms account. If you’re a new user, create an account to begin your journey.
- Browse through our extensive library or use the Preview mode to evaluate form descriptions carefully to find what's best for your needs.
- If you encounter any discrepancies or need alternatives, utilize the Search feature to pinpoint the exact form that meets your local jurisdiction requirements.
- Once you’ve found the right document, click on the Buy Now button and select your desired subscription plan.
- Input your payment information using a credit card or PayPal to complete your purchase.
- Download the completed form and store it on your device. You can also access it anytime through the My Forms section in your account.
With US Legal Forms, not only do you gain access to a vast array of legal documents, but you also benefit from expert assistance to ensure your forms are completed accurately and legally sound.
Start today by logging in or creating an account—experience the ease and reliability of US Legal Forms!
Form popularity
FAQ
To select a title in Word, simply click on the title text. If you need to select the entire title, you may want to double-click it to highlight the entire phrase. This will allow you to edit or format the title further, ensuring it meets your project's needs. Using the 'Select All' option is also a quick way to highlight everything, including your title, if needed.
The title on a Word document typically appears at the top of the page, often in a larger and bold font. It may also be centered or aligned to the left, depending on your formatting choice. If you need to insert a new title, go to the top of your document and either type or insert a text box for added control over its position.
To give a title to a file, open the file manager and navigate to the document you want to title. Right-click on the file and select 'Rename' from the menu, or simply click on the file name. Type in the new title, ensuring clarity and relevance to your content, and press Enter to save the new name.
To select a specific part of a Word document, use your mouse to click and drag over the text you want to highlight. Alternatively, you can hold down the Shift key while clicking on the beginning and end of the desired text. This method allows you to select text precisely and effortlessly, making editing simple and efficient.
Editing the title in a Word document is simple. Click on the title you want to modify, and Word will let you make changes directly. You can also use the mouse to highlight the text and type over it. After completing your edits, always remember to save your document to ensure your changes are kept.
To select a title case in Word, first highlight the text that you want to change. Then, navigate to the 'Home' tab on the ribbon. Look for the 'Change Case' button in the Font group; click on it and select 'Title Case' from the dropdown menu. This will ensure your titles appear professional and properly formatted.
To select only part of text, use your mouse to click and drag across the desired words. Alternatively, you can click at the start of the text, hold 'Shift', and click at the end of the text you want to highlight. Precision in selection allows for efficient editing and clarity in your documents. If you encounter issues, resources like US Legal Forms can help streamline your document processes.
To selectively select text in Word, you can use your mouse or keyboard shortcuts. Click and drag to highlight text or hold down 'Shift' while using the arrow keys for more precise selection. This technique is especially useful for focusing on specific sections when editing or formatting documents. Mastering this function can significantly enhance your overall document management experience.
If your Word document is not allowing you to highlight text, check if the document is in 'Read Only' mode. Additionally, ensure that your application is not corrupted or frozen, as these issues can prevent selection. Restarting your application or computer can also resolve temporary glitches. If problems persist, consider reaching out to resources such as US Legal Forms for guidance.
To select text in different areas, hold down the 'Ctrl' key (or 'Command' key on Mac) while clicking on the desired text segments. This allows you to highlight multiple, non-adjacent sections easily. Using this method can enhance your editing process by focusing on specific bits of information without losing your other selections. It's a handy technique for managing complex documents.