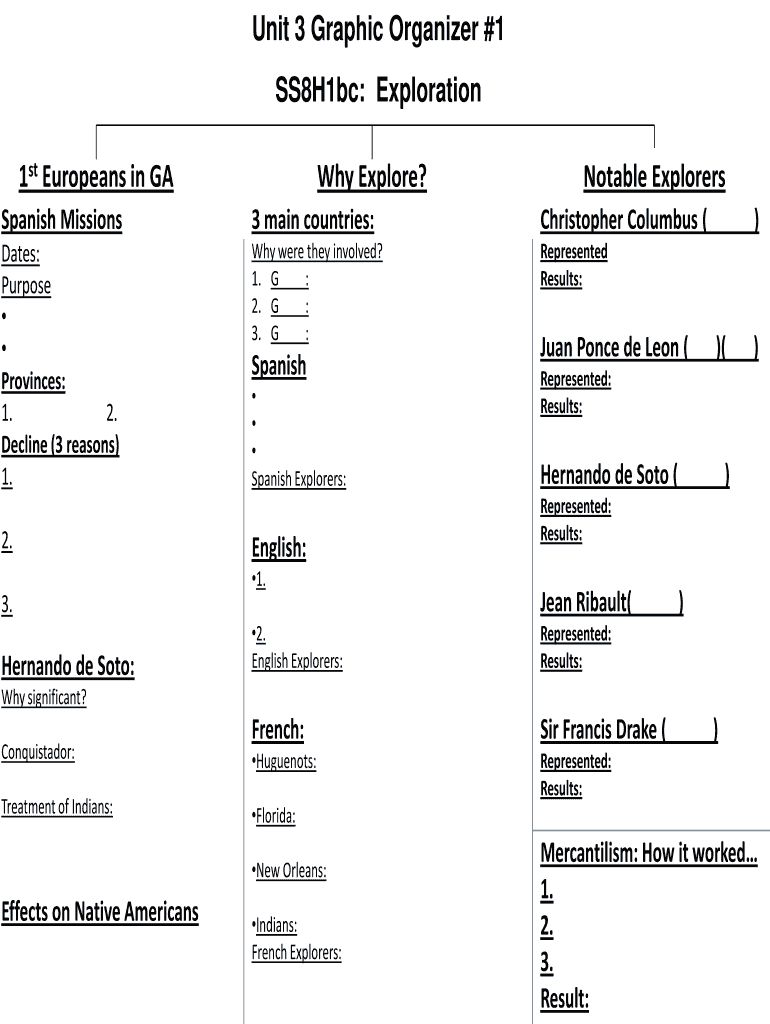
Unit 3 Graphic Organizer #1 SS8H1bc: Exploration 1st Europeans in GA Why Explore? Notable Explorers Spanish Missions 3 main countries: Christopher Columbus ( Dates: Purpose Provinces: 1. 2. Decline.

Open form follow the instructions

Easily sign the form with your finger

Send filled & signed form or save
How to fill out the Unit 3 Graphic Organizer online
The Unit 3 Graphic Organizer serves as a valuable tool for organizing information related to the exploration and colonization phases in Georgia's history. This guide provides clear, step-by-step instructions to help users effectively complete the form online.
Follow the steps to fill out the Unit 3 Graphic Organizer online.
- Click the ‘Get Form’ button to obtain the Unit 3 Graphic Organizer and open it in your preferred online editor.
- Begin with the section titled 'Why Explore?'. Here, summarize the motivations behind exploration, making sure to include key points that highlight the objectives.
- Next, move to the 'Notable Explorers' section. Identify and list the significant explorers for each of the three main countries: Spain, England, and France. Ensure to provide a brief description for each explorer.
- Fill in the 'Spanish Missions' section with details about three main provinces, including their purpose and decline reasons.
- In the 'Why were they involved?' section, use bullet points to denote the three primary motivations: God, Glory, and Gold.
- Continue to the 'Represented' and 'Results' components, where you will outline the legacy and impact of each explorer on their respective nations and native populations.
- Once all fields are completed, review your entries for accuracy. Then, you can save your changes, download a copy, print, or share the completed form.
Complete the Unit 3 Graphic Organizer online today to enhance your understanding of Georgia's exploration and colonization.
Experience a faster way to fill out and sign forms on the web. Access the most extensive library of templates available.
Related content
Filed Under: RWT curriculum pillar resources Tagged With: Assessment, Culture and...
Apr 25, 2008 — Stage 3: Groups do it: Teams of students construct graphic organizers via...
Define and Procure - Helps you understand the elements of the PlantPAx system to make sure...
Get answers to your most pressing questions about US Legal Forms API.
What is the 3-2-1 study technique?
The 3-2-1 study technique is a learning strategy that encourages students to synthesize information. In this method, students identify three key lessons, two notable points, and one question they still have about the material. This technique helps solidify understanding and promotes inquiry. Making use of the Unit 3 Graphic Organizer enhances this approach by providing a clear visual framework for students to articulate their thoughts.
What is a 3-2-1 graphic organizer?
A 3-2-1 graphic organizer is similar to the 321 format, providing a simple structure for summarizing information. It requires students to jot down three things they learned, two ideas they found interesting, and one question they still have. This method fosters engagement and deeper reflection. If you're using a Unit 3 Graphic Organizer, this format can help organize your insights effectively.
What are the 5 examples of graphic organizer?
There are several types of graphic organizers, including Venn diagrams, mind maps, flow charts, storyboards, and outline organizers. Each of these serves a unique purpose in visually representing information. When using a Unit 3 Graphic Organizer, you may find that some of these formats enhance understanding based on your specific learning objectives.
What is a 321 organizer?
A 321 organizer is a specific type of graphic organizer that helps students digest information from a lesson or reading. It consists of three key takeaways, two intriguing details, and one lingering question. This organizer not only aids in learning but also promotes critical thinking. Implementing a Unit 3 Graphic Organizer can make this process more effective and streamlined.
What is the 3-2-1 teaching technique?
The 3-2-1 teaching technique encourages students to process information in a structured way. Students list three things they learned, two interesting facts, and one question they still have. This approach enhances comprehension and retention. Using a Unit 3 Graphic Organizer can provide a visual framework to support this technique, making it easier for students to convey their thoughts.
How do I make a graphic organizer for my computer?
You can easily create a graphic organizer on your computer using various software applications such as Microsoft Word, Google Docs, or specialized tools like Lucidchart. Start by choosing a template that suits your needs, or create one from scratch using shapes and lines. Customize your organizer with colors and labels for clarity. This step will enhance your experience with your Unit 3 Graphic Organizer.
What is a 321 graphic organizer?
A 321 graphic organizer is a structured format that helps students summarize key concepts from lessons or readings. The format typically includes three things they learned, two interesting facts, and one question they still have. This type of organizer facilitates deeper understanding and engagement. The Unit 3 Graphic Organizer can serve as an effective tool to implement this technique in your learning process.
How do you organize a graphic organizer?
To organize a graphic organizer effectively, start by identifying your main topic. Next, break the topic into key subtopics or categories. Use shapes such as circles and rectangles to visually separate these elements. Finally, ensure each section flows logically to create a comprehensive view, which is essential when using tools like the Unit 3 Graphic Organizer.
Can you make a graphic organizer in Google Docs?
Yes, you can make a graphic organizer in Google Docs using the drawing tool and available Shapes menu. This functionality allows you to create your Unit 3 Graphic Organizer collaboratively, with easy sharing options for feedback. Google Docs also enables you to include images and links, enriching your organizer’s content. Take advantage of these features to enhance your graphic organizer.
How do I create a graphic organizer?
To create a graphic organizer, start with a blank canvas on paper or a digital platform. Identify the key ideas you want to convey and use shapes to represent these ideas in your Unit 3 Graphic Organizer. Incorporate connecting lines to show relationships between ideas. Several applications and websites offer templates to guide you, ensuring your design meets your needs.
Use professional pre-built templates to fill in and sign documents online faster. Get access to thousands of forms.
If you believe that this page should be taken down, please follow our DMCA take down process here.