Loading

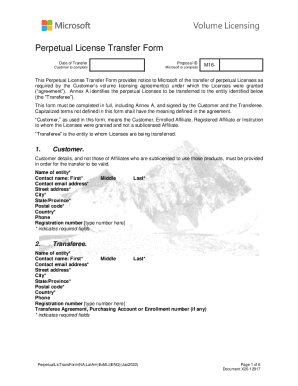
Get Microsoft Perpetual License Transfer Form 2022-2025
How it works
-
Open form follow the instructions
-
Easily sign the form with your finger
-
Send filled & signed form or save
How to fill out the Microsoft Perpetual License Transfer Form online
This guide provides a clear and detailed approach to completing the Microsoft Perpetual License Transfer Form online. It is designed to assist users in accurately filling out each section of the form, ensuring a smooth transfer process.
Follow the steps to complete the Microsoft Perpetual License Transfer Form effectively.
- Click ‘Get Form’ button to obtain the form and open it in the online editor.
- Fill out the 'Customer' section with the required details. This includes the name of the entity, contact name (first and last), email address, street address, city, state or province, postal code, country, phone number, and registration number. Make sure to provide accurate information as this is crucial for the validity of the license transfer.
- Proceed to the 'Transferee' section. Here, you should enter the same types of information for the entity receiving the licenses. This includes the entity's name, contact name (first, middle, last), email address, street address, city, state or province, postal code, country, phone number, and registration number. Additionally, if applicable, include the transferee agreement or enrollment number.
- In the 'Reason for License transfer' section, indicate the applicable reason for the transfer by checking the corresponding box. If you need Microsoft’s written consent, ensure to detail the reason and attach any necessary supporting documents, especially if it relates to bankruptcy or liquidation.
- Complete the 'Customer and Transferee acknowledgements' section carefully. Both parties must read and confirm their understanding of the terms regarding the licenses being transferred. Ensure all representations and warranties are acknowledged, as this is essential for compliance.
- Review the signatures required from both the Customer and the Transferee. Each party must sign, print their name, indicate their title, and include the date of the signature. Note that the form is only valid if signed by authorized individuals.
- Lastly, check Annex A for detailing the licenses being transferred. Fill in the table with the license ID, product name, part number, product type, version, language, country of use, and the number of licenses being transferred. If more space is needed, attach additional pages as required.
- Once all fields are filled and double-checked for accuracy, save changes to the form. You can then download, print, or share the completed form as necessary.
Complete your Microsoft Perpetual License Transfer Form online today to ensure a smooth transfer process.
Steps Log in to your account on OfficeTimeline.com. Once logged in, click on your username in the upper-right corner of the screen and select Subscriptions from the drop-down menu. Here, locate your Office Timeline Online subscription and click the green Assign Licenses button.
Industry-leading security and compliance
US Legal Forms protects your data by complying with industry-specific security standards.
-
In businnes since 199725+ years providing professional legal documents.
-
Accredited businessGuarantees that a business meets BBB accreditation standards in the US and Canada.
-
Secured by BraintreeValidated Level 1 PCI DSS compliant payment gateway that accepts most major credit and debit card brands from across the globe.


