Loading
Get Insert Project Name Insert Project Address
How it works
-

Open form follow the instructions
-

Easily sign the form with your finger
-

Send filled & signed form or save
How to fill out the supportive services access plan (SSAP) online
The supportive services access plan (SSAP) is a crucial document used to outline the services provided to residents in various housing situations. This guide will assist you in filling out the SSAP for your project online, ensuring that you provide comprehensive and accurate information.
Follow the steps to complete your SSAP effectively.
- Click ‘Get Form’ button to obtain the form and open it in the editor.
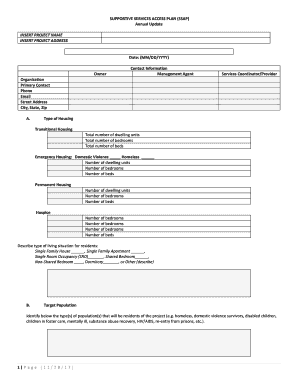
- Begin by entering the project name and address. This information clearly identifies the specific project the SSAP is associated with, serving as a reference point for all stakeholders.
- Fill in the date of completion in the format MM/DD/YYYY to maintain clarity and consistency.
- Complete the owner and management agent sections by providing the necessary contact information, including the name of the organization, primary contact, phone number, email, and physical address.
- In section A, indicate the type of housing, including the number of dwelling units, bedrooms, and beds for transitional housing, emergency housing, permanent housing, and other classifications as applicable.
- Describe the living situations of residents, selecting the appropriate options such as single-family house, single-family apartment, or shared bedroom.
- Identify the target population for your project in section B, specifying the demographic groups being served. If there have been changes in the target population, include details in the space provided.
- In section C, provide information regarding the facility’s licensing status, including type and number. Be clear about any limitations based on funding sources.
- Section D focuses on residents' access to support and services. Summarize any recent changes to services provided. Include information on how residents' needs are assessed and individual service plans are developed.
- For sections E and F, only complete these if the service provider is not the property manager. Discuss the effectiveness of the referral process and communication plans.
- If applicable, attach any current facility security or emergency plans in sections G and H, ensuring compliance with necessary regulations.
- Lastly, complete section I by identifying any other monitoring agencies that regularly oversee your project.
- In section J, select the appropriate action plan required by the owner or agent and provide the necessary details for implementation.
- Once all sections are completed, ensure all information is accurate and saved. You can then download, print, or share the form as needed.
Complete your supportive services access plan (SSAP) online today to enhance service delivery and compliance.
Linking Project files You can insert a subproject anywhere in the task list of the master project. Click Project > Subproject. In the Insert Project box, select the subproject you want to insert. To insert multiple subprojects, hold down Ctrl and click the subprojects in the order that you want to insert them.