Loading
Get Authorization To Release - Baptist Health
How it works
-

Open form follow the instructions
-

Easily sign the form with your finger
-

Send filled & signed form or save
How to fill out the authorization to release - Baptist Health online
Filling out the authorization to release form for Baptist Health is an essential step in ensuring that your medical information is shared appropriately. This guide provides clear and supportive instructions for completing the form online, catering to users of all experience levels.
Follow the steps to successfully complete the authorization form.
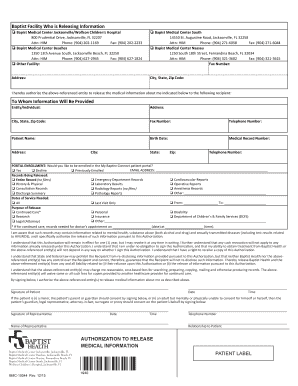
- Click the ‘Get Form’ button to obtain the authorization form and open it in your chosen editing platform.
- Begin by identifying the Baptist Health facility releasing your information. Choose from Baptist Medical Center Jacksonville/Wolfson Children's Hospital, Baptist Medical Center Beaches, Baptist Medical Center South, or Baptist Medical Center Nassau, and provide their details.
- In the section titled 'To Whom Information Will Be Provided,' meticulously fill in the name, address, city, state, zip code, fax number, and telephone number of the entity or individual receiving the information.
- Provide your personal details in the 'Patient Information' section. This includes your name, birth date, medical record number, address, city, state, zip code, and telephone number.
- Indicate whether you would like to be enrolled in the My Baptist Connect patient portal. Choose 'Yes,' 'Decline,' or 'Previously Enrolled.' Provide your email address if you select 'Yes.'
- Select the records you wish to have released, marking the corresponding checkboxes for options such as emergency department records, cardiovascular reports, and others. You can also specify 'Other' records if applicable.
- In the 'Dates of Service Needed' section, enter the date range for the records you require or choose 'All' or 'Last Visit Only'.
- Indicate the purpose of the record release by checking the relevant box, providing details for 'Other' purposes if necessary. If for continued care, make sure to include the appointment date and time.
- Review the authorization statement concerning the release of sensitive information. Acknowledge your understanding of the conditions by checking the appropriate box.
- Sign and date the form in the designated area. If applicable, have a representative sign on your behalf, providing their name, relationship, and contact information.
- Once the form is completed, save your changes, and you may choose to download, print, or share the completed form as necessary.
Complete your authorization to release documents online today for efficient management of your medical information.
How to convert read-only PDF to editable PDF online free? Go to Sejda OCR Recognize Text in PDF Online > Click Upload PDF file to upload the read-only PDF. ... Select the language of your document and choose PDF as the output format. ... After the PDF is ready, tap on the Edit icon to switch to the edit feature.