Loading
Get Physician Order Form Imaging Services - Ohsu
How it works
-

Open form follow the instructions
-

Easily sign the form with your finger
-

Send filled & signed form or save
How to fill out the Physician Order Form Imaging Services - OHSU online
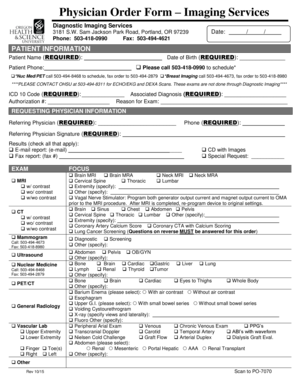
Filling out the Physician Order Form Imaging Services at OHSU is an important step in ensuring that patients receive the appropriate imaging services. This guide provides clear and supportive instructions on how to complete the form accurately online, catering to users with varying levels of experience.
Follow the steps to fill out the form accurately and efficiently.
- Click the ‘Get Form’ button to obtain the form and open it for editing.
- Enter the required patient information, including the patient's name, date of birth, and phone number. Make sure to mark the appropriate scheduling options, based on the type of imaging service needed.
- Fill in the ICD 10 code and the associated diagnosis to ensure proper billing and care. Provide an authorization number, if applicable, and clearly state the reason for the exam.
- Complete the requesting physician information section. Input the physician's name and phone number, and ensure their signature is included.
- Select the type of exam required. Be specific about options such as MRI, CT, ultrasound, or any other service by marking the appropriate checkboxes.
- If applicable, specify the focus of the exam by selecting the relevant anatomical regions or conditions addressed in the imaging service.
- Respond to the required questions related to patient preparation, ensuring to follow any specific instructions for the selected imaging exam.
- Provide reminders for patient instructions, including the necessity of bringing an insurance card and any preparation requirements before the appointment.
- Once all fields have been accurately filled, save changes to the document. Users can then download, print, or share the form as necessary.
Start completing the Physician Order Form Imaging Services online to ensure the best care for your patients.
If the worksheet is protected, do the following: On the Review tab, click Unprotect Sheet (in the Changes group). Click the Protect Sheet button to Unprotect Sheet when a worksheet is protected. If prompted, enter the password to unprotect the worksheet.