Loading
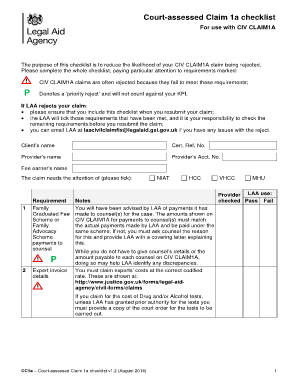
Get Claim 1a Checklist
How it works
-

Open form follow the instructions
-

Easily sign the form with your finger
-

Send filled & signed form or save
How to fill out the Claim 1a Checklist online
Completing the Claim 1a Checklist accurately is essential to increase the likelihood of your CIV CLAIM1A application being approved. This guide provides clear, step-by-step instructions to assist users with filling out the checklist online effectively.
Follow the steps to complete your Claim 1a Checklist online.
- Click the ‘Get Form’ button to retrieve the Claim 1a Checklist and open it for editing. This initiates the process of filling out the necessary information.
- Begin by entering the client’s name, certificate reference number, provider’s name, provider’s account number, and fee earner’s name in the designated fields. Ensure all entries are accurate to avoid delays.
- Review the requirements listed in the checklist. For each requirement, check the corresponding box to indicate its status as met. Fields marked with a ‘P’ denote priority requirements that are critical for acceptance.
- For payments to counsel, ensure that the amounts claimed match those paid under the respective schemes. If there are discrepancies, investigate the reasons and include a covering letter explaining any differences.
- Attach vouchers for every disbursement of £20 or more, ensuring they include the service provider's details, the client's name, and a breakdown of the work completed, if necessary. List all vouchers in numerical order on the provided pages.
- Complete the statutory charge section if applicable, ensuring all relevant documentation, including a completed CIV ADMIN1 form, is included for LAA review.
- Check that the correct fee scheme and rates have been utilized, and provide details on profit costs in the relevant fields of the Claim 1a form.
- Verify that the correct version of the Claim form is being used and that all portions of the form are fully completed before submission.
- Sign and date the certification section of the claim form to ensure compliance. Remember that an original signature is required.
- Once all steps are complete, save changes to your checklist, and then download or print a copy for your records. You may also choose to share the completed form as necessary.
Complete your documents online today to enhance your chances of claim acceptance.
What I did was I added div tags to contain each input and label elements. I added a same class to all of the divs and flex them with css. (display: flex; flex-direction: row; ) << this will bring the input on the left and label on the right. If you want it opposite you can use flex-direction: row-reverse instead.