STATEMENT COMPANY NAME LOGO STREET ADDRESS CITY, STATE ZIP CODE PHONE NUMBER DATE ACCOUNT NUMBER $ E DATE TYPE DESCRIPTION L AMOUNT is Pl ea se N ot e: S Th is im ag e A no t to sc al e M -I t ha.
Open form follow the instructions
Easily sign the form with your finger
Send filled & signed form or save
How to use or fill out the PLEASE DETACH AND RETURN THIS PORTION WITH YOUR PAYMENT online
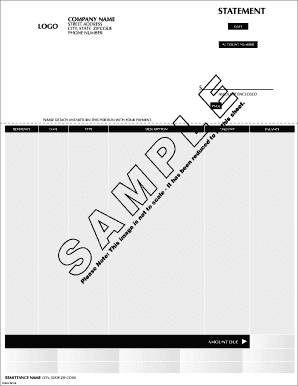
This guide provides you with a step-by-step approach to successfully filling out the 'Please Detach and Return This Portion with Your Payment' online. Follow these instructions carefully to ensure that your payment is processed efficiently.
Follow the steps to complete your payment form online.
- Click 'Get Form' button to obtain the form and open it in the editor.
- Locate the section labeled 'Date' where you should enter the current date. This indicates when you are submitting the payment.
- In the 'Account Number' field, enter your unique account number. This helps the company identify your account for processing your payment accurately.
- Look for the 'Amount Due' section. Here, you should input the total amount that you owe as indicated on the statement.
- In the 'Amount Enclosed' field, enter the amount of money you are sending with this payment. Ensure this matches the 'Amount Due' for accurate processing.
- Fill in your name and address in the 'Remittance Name' and 'City, State, ZIP Code' sections. This is essential for confirming the identity of the payment sender.
- Review all entries for accuracy. Once you are satisfied that the information is correct, you can choose to save the changes, download the form, print it, or share it as needed.
Complete your payment form online to ensure your transaction is processed smoothly.
Experience a faster way to fill out and sign forms on the web. Access the most extensive library of templates available.
Related content
Jul 9, 2012 — Please make checks payable to TelePacific Communications. II, I, I I I, I...
Dec 31, 2019 — For billing, scheduling or customer service: (866) 783- ... PLEASE DETACH...
Jan 23, 2015 — You must pay your promotional balance of$217.12 in full by 06/14/15 to...
Get answers to your most pressing questions about US Legal Forms API.
How do I cancel a check payment in QuickBooks?
Go to Bookkeeping then Transactions then select Expenses (Take me there), or go to Expenses (Take me there). In the Expense Transactions list, locate the check to void. From the Action column, select Void from the View/Edit ▼ dropdown menu. When prompted, select Yes to confirm you want to void the check.
How do I unlink payments in QuickBooks?
Choose the payment you want to remove and click on "edit" from the options. The click on "delete line" under the edit menu to delete a payment in Quickbooks. Then select ok to confirm the removal of the payment. Click on save and the close.
How do I cancel and reissue a check in QuickBooks?
How do we reissue a lost check? Go to Expenses menu. Choose Filter in the Expense tab. In the Type field, select Check. Pick the date range in which the check was received and hit Apply. Click the check to open the Check screen. Select More, then choose Void from the pop-up menu.
What happens if I delete a paid invoice in QuickBooks?
When you delete a transaction in QuickBooks, the transaction is completely erased from your books, and it won't appear on any reports or in any accounts. You can recover some details of the transaction using the audit log in QuickBooks, but you can't recover the whole transaction.
How do I remove a payment from an invoice in QuickBooks desktop?
In the Accounts Payable register, select the specific bill or bill payment check. Select the Edit menu, then Void/Delete Bill/Bill Pmt-Check. Select Record, then Yes to save the changes.
How do you void and reissue a check in QuickBooks for a closed period?
How do I void a check from a closed period that has exp and liability on it and reissue it in the current period? Open the Bill Payment. Click the Delete drop-down list. Choose either Delete Check or Void. Click Yes.
How do I stop a payment and reissue check in QuickBooks?
The process for QuickBooks Desktop will be slightly different. Step 1: Navigate to the Check Screen. ... Step 2: Find the Check on the Check Register. ... Step 3: Click on Edit. ... Step 4: Void the Check. ... Step 5: Dismiss the Warning. ... Step 6: Reissue the Check.
Use professional pre-built templates to fill in and sign documents online faster. Get access to thousands of forms.
If you believe that this page should be taken down, please follow our DMCA take down process here.