Loading
Get College Student Waiver Form - Mvp Broker Home Page
How it works
-

Open form follow the instructions
-

Easily sign the form with your finger
-

Send filled & signed form or save
How to fill out the College Student Waiver Form - MVP Broker Home Page online
This guide provides detailed instructions on filling out the College Student Waiver Form for MVP Health Care. Designed to support users at any experience level, we will walk through each section of the form to ensure a smooth online submission process.
Follow the steps to complete the College Student Waiver Form online.
- Click ‘Get Form’ button to access the waiver form and open it in your preferred editor.
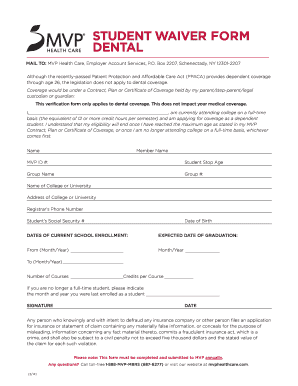
- Fill in your full name where indicated. This should match the name on your identification documents.
- Provide the member's name, which may differ from your name if you are a dependent.
- Enter the MVP ID number associated with the insurance coverage of your parent or guardian.
- Indicate the student stop age as outlined in the MVP contract or policy.
- Complete the group name and group number fields. These should be found on the insurance documents.
- Fill in the name and address of your college or university. Ensure the details are accurate to avoid processing delays.
- Provide the registrar’s phone number for verification purposes.
- Enter your social security number and date of birth in the designated fields.
- Fill in the dates of your current school enrollment. Include both the start and expected graduation month/year.
- Indicate the number of courses you are enrolled in and the credits per course.
- If applicable, indicate the month and year you were last enrolled as a full-time student.
- Sign and date the form to certify the information is correct to the best of your knowledge.
- Once completed, review the form for accuracy. You can then save your changes, download a copy, print it out, or share it as needed.
Complete your College Student Waiver Form online today for a hassle-free submission.
Create a Group in the Azure Active Directory. Assign Licenses to Groups in Azure AD. Verify Group-based License Assignment. Check Microsoft 365 License Assignment Path. Create Group with Microsoft Graph PowerShell. Add Users to Group Using Graph PowerShell. Apply License to the Group Using MS Graph.
Industry-leading security and compliance
US Legal Forms protects your data by complying with industry-specific security standards.
-
In businnes since 199725+ years providing professional legal documents.
-
Accredited businessGuarantees that a business meets BBB accreditation standards in the US and Canada.
-
Secured by BraintreeValidated Level 1 PCI DSS compliant payment gateway that accepts most major credit and debit card brands from across the globe.