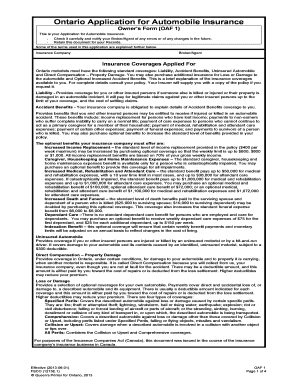
Owner's Form (OAF 1) ... Your Insurer will supply you with a copy of the policy if you ... For purposes of the Insurance Companies Act (Canada), this document was issued ... FSCO (1213E).

How it works
  • Open form

    Open form follow the instructions

  • Easily sign form

    Easily sign the form with your finger

  • Share form

    Send filled & signed form or save

How to fill out the OAF1 Form online

Filling out the OAF1 Form online for automobile insurance can seem daunting, but with clear guidance, you can navigate the process smoothly. This step-by-step guide will help ensure that all required information is accurately completed, setting you up for a successful application.

Follow the steps to effectively complete your online OAF1 Form.

  1. Click ‘Get Form’ button to obtain the form and open it in the editor.
  2. Begin by selecting the type of application you are submitting: 'New policy,' 'Replacing Policy No.,' or 'Broker/Agent bill.' Indicate your preference for language, either English or French.
  3. In the next section, specify the effective date for the policy. This is the date when your insurance will begin.
  4. Complete the section regarding the primary use of the vehicle. Specify if it is for commuting, pleasure, business, or any other use. Indicate the estimated annual driving distance and if the vehicle will be used for car pooling.
  5. List all drivers of the described automobile in the household or business. For each driver, include their name, date of birth, driver's license number, and relevant details regarding their driving experience.
  6. Provide information on any prior accidents and insurance claims from the past six years that involve the applicant or listed drivers. Detail the nature of these claims if applicable.
  7. In the Rating Information section, this is for agent/broker use only. It will include details like class ratings and any discounts applicable to the policy.
  8. In the Remarks section, include any additional comments or details that may be necessary for understanding your application.
  9. Carefully review the declaration of the applicant. Confirm that all details provided are accurate and that you understand the implications of false information.
  10. Once all sections are complete, you can then choose to save changes, download a copy of the form, print it, or share it as necessary.

Begin the process of completing your OAF1 Form online today and ensure your automobile insurance needs are met.

Get form

Experience a faster way to fill out and sign forms on the web. Access the most extensive library of templates available.

Related content

Yeast transcription factor Oaf1 forms homodimer...

Oct 3, 2008 — This induction is known to be mediated by the binding of a heterodimer of...

Learn more
Protein Details

-Genomic Data for OAF1, Links. Protein: OAF1 ... you to the corresponding entry for Oaf1...

Learn more
840802 GPS Survey Receiver User Manual HiPer Lite...

Output drop-down list – select type and format of differential corrections....

Learn more
Questions & Answers

Get answers to your most pressing questions about US Legal Forms API.

Contact support

How do you fit the contents of a table?

In "Table Tools" click the [Layout] tab > locate the "Cell Size" group and choose from of the following options: To fit the columns to the text (or page margins if cells are empty), click [AutoFit] > select "AutoFit Contents." To fit the table to the text, click [AutoFit] > select "AutoFit Window."

On the Home tab, right-click any style in the Styles gallery and click Modify. In the Formatting section, make any formatting changes you want, such as font style, size, or color, alignment, line spacing, or indentation. Choose whether the style change applies to the current document or to all future documents.

On the Layout tab, in the Cell Size group, click AutoFit. Do one of the following. To adjust column width automatically, click AutoFit Contents. To adjust table width automatically, click AutoFit Window.

The problem is that only if the entire paragraph is formatted as a heading will it be included in the TOC. The easiest way to make sure that you apply the Linked heading style to the entire paragraph is to NOT select any word or phrase in the heading paragraph.

To do that, we'll use a custom style. Select the text that we want to appear in the Table of Contents. ... Open Styles gallery > Create a Style > OK. Click ahead of the Table of Contents. ... The first three Heading Styles are mapped to the first three TOC levels. ... The preview now shows the new style under Heading 3.

0:19 2:18 Deleting the bold in the TOC - YouTube YouTube Start of suggested clip End of suggested clip Make sure the show/hide. Function is displayed. So I'm going to highlight this heading one I'm goingMoreMake sure the show/hide. Function is displayed. So I'm going to highlight this heading one I'm going to go control spacebar. And ctrl Q now when I update the TOC.

Format the text in your table of contents Go to References > Table of Contents > Custom Table of Contents. Select Modify. ... In the Styles list, click the level that you want to change and then click Modify. In the Modify Style pane, make your changes. Select OK to save changes.

The normal way to create a table of contents (TOC) is to let Word automatically create one based upon the headings in a document. Each paragraph formatted with the Heading 1 style, Heading 2 style, and Heading 3 style are automatically pulled into the TOC.

Get This Form Now!

Use professional pre-built templates to fill in and sign documents online faster. Get access to thousands of forms.

If you believe that this page should be taken down, please follow our DMCA take down process here.

Get Oaf1 Form