Rotate Word Options Templates For Free
How it works
-
Import your Options Forms from your device or the cloud, or use other available upload options.
-
Make all necessary changes in your paperwork — add text, checks or cross marks, images, drawings, and more.
-
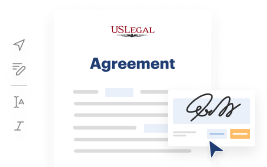
Sign your Options Forms with a legally-binding electronic signature within clicks.
-
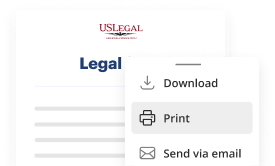
Download your completed work, export it to the cloud, print it out, or share it with others using any available methods.
How to Rotate Word Options Templates For Free
Are you fatigued by incessant document printing, scanning, postal mailing, and consuming valuable time and resources with manual completion? The era has progressed, and the simplest method to Rotate Word Options Templates For Free and perform any other vital modifications to your forms is by managing them online. Select our swift and dependable online editor to complete, modify, and execute your legal documents with utmost efficiency.
Sign and request signatures. Regardless of the method you select, your electronic signature will be legally recognized and acceptable in court. Send your form to others for approval via email or signing links. Notarize the document directly in our editor if it requires witnessing. Share and save the copy. Download or export your completed documents to the cloud in the required file format, print it out if you need a physical copy, and choose the most suitable file-sharing method (email, fax, SMS, or dispatched by traditional mail using the USPS). With our service, you no longer have any reasons to handle legal documents manually. Save time and energy completing them online twice as swiftly and more efficiently. Give it a try now!
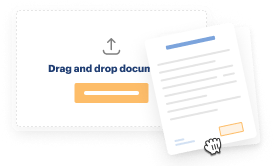
- Upload or import a document to the editor.
- Drag and drop the template into the upload area, import it from the cloud, or utilize another option (extensive PDF library, emails, URLs, or direct form requests).
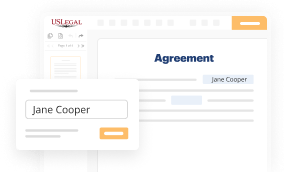
- Provide the necessary details. Complete blank fields using the Text, Check, and Cross tools from our upper pane.
- Utilize our editor’s navigation to ensure you’ve finished everything. Highlight the most significant information with the Highlight option and delete or black out fields with no content.
- Modify and rearrange the form. Use our upper and side toolbars to revise your content, insert additional fillable fields for various data types, reorder pages, add new ones, or eliminate unnecessary ones.

Benefits of Editing Options Forms Online
Top Questions and Answers
Changing template settings in Word requires accessing the design settings for your specific template. Click on the Design tab and look for the options that suit your needs. For more comprehensive options, consider using Rotate Word Options Templates to customize your settings effectively.
Tips to Rotate Word Options Templates For Free
- Select the text you want to rotate
- Go to the 'Format' tab in the toolbar
- Click on the 'Text Effects' option
- Choose 'Transform'
- Select a rotation option from the list
Rotating text can add creativity and visual interest to your documents. It can be useful when you want to make certain words or headings stand out, or when you want to add a unique design element to your document.
Related Searches
Rotate 90 degrees Select the object that you want to rotate. Go to Shape Format, Drawing Tools or Picture Tools > Format. Select Rotate, and then: To rotate the object 90 degrees to the right, select Rotate Right 90°. To rotate the object 90 degrees to the left, select Rotate Left 90°. Use a text box to rotate or mirror text in your document. ... Select the text box, and then go to Shape Format or Drawing Tools Format > Rotate. Highlight the text you want to rotate, click on Layout (or Format depending on your version of Microsoft Word), then click the Text Direction ... I have a label template, and I wish to print it in landscape view. I can certainly rotate the text in each cell to accomplish my aim, ... 1. Rotate a text box in Microsoft Word for Windows using the rotation arrow · Select the text box by clicking anywhere inside the shape. · Click ... Then click on ?Format? at the top of the page, and select ?Text Direction? from the list of options. Select the text orientation you need and select okay. Launch Microsoft Word. Click the ?File? tab. Click ?Open.? Browse to the saved table card document file with the text to rotate. Double-click the ... Rotate a text box: Go to Insert > Text Box to create a text box. Select the box and drag the rotation handle to the right or left to rotate. Go to "Page" menu, select the pages you want to rotate, and then choose direction of rotation by clicking the icon named "Left rotate" or "Right rotate". Or you ... Word>Rotating text. otuatail AM 04-24-2023. Hi I have ordered some printing labels from Avery. I got the template but I have discovered that they are ...
Industry-leading security and compliance
-
In businnes since 1997Over 25 years providing professional legal documents.
-
Accredited businessGuarantees that a business meets BBB accreditation standards in the US and Canada.
-
Secured by BraintreeValidated Level 1 PCI DSS compliant payment gateway that accepts most major credit and debit card brands from across the globe.
-
VeriSign secured#1 Internet-trusted security seal. Ensures that a website is free of malware attacks.