Number Pages In Online Personal Templates For Free
How it works
-

Import your Personal Forms from your device or the cloud, or use other available upload options.
-
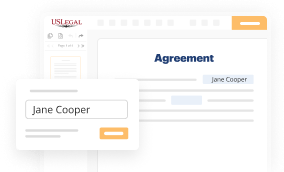
Make all necessary changes in your paperwork — add text, checks or cross marks, images, drawings, and more.
-

Sign your Personal Forms with a legally-binding electronic signature within clicks.
-
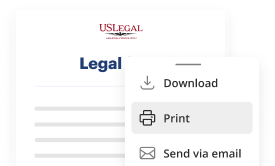
Download your completed work, export it to the cloud, print it out, or share it with others using any available methods.
How to Number Pages In Online Personal Templates For Free
Are you weary of constant document printing, scanning, postal dispatch, and wasting valuable time and resources on manual completion? Times have progressed, and the easiest method to Number Pages In Online Personal Templates For Free and make any other essential modifications to your forms is by managing them digitally. Choose our fast and dependable online editor to finalize, alter, and execute your legal documents with peak efficiency.
With our service, you have no more reasons to prepare legal documents manually. Save time and effort executing them online at twice the speed and more effectively. Give it a try now!
- Upload or import a file to the platform. Drag and drop the template into the upload area, import it from the cloud, or utilize another option (comprehensive PDF library, emails, URLs, or direct form requests).
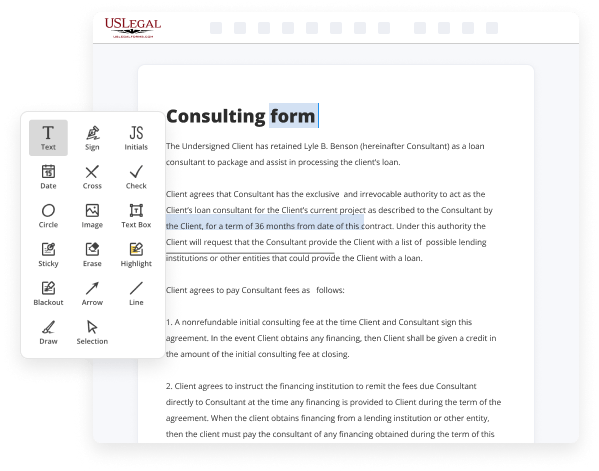
- Provide the necessary information. Complete vacant fields using the Text, Check, and Cross tools from our top panel. Use our editor’s navigation to ensure all details are filled in. Emphasize the most crucial details with the Highlight feature and remove or obscure areas with no significance.
- Adjust and reorganize the form. Utilize our upper and side toolbars to modify your content, add extra fillable fields for various data types, rearrange sheets, include new ones, or eliminate unnecessary items.
- Sign and solicit signatures. Regardless of the method you select, your electronic signature will be legally binding and admissible in court. Send your form to others for approval via email or signing links. Notarize the document directly in our editor if it requires witnessing.
- Share and save the copy. Download or export your finalized documents to the cloud in the desired file format, print it out if a physical copy is needed, and choose the most suitable file-sharing option (email, fax, SMS, or send by traditional mail using the USPS).

Benefits of Editing Personal Forms Online
Top Questions and Answers
To number pages in Word online, first open your document within your web browser. Click on the 'Insert' menu, select 'Page Number,' and choose your desired format. This method ensures all pages in your document are numbered consistently, making it an excellent solution for organizing your online personal templates effectively.
Tips to Number Pages In Online Personal Templates For Free
- Place the page numbers in either the header or footer of the template
- Use a consistent font style and size for the page numbers
- Consider using a smaller font size to ensure the page numbers do not distract from the content
- Number the pages in sequential order
- Ensure that the page numbers are easily visible and legible
Adding page numbers to online personal templates can help users keep track of the order of their documents, especially when working with lengthy or complex content. This editing feature may be needed when creating resumes, portfolios, or academic papers that require precise organization and navigation.
Related Searches
Select Insert > Page Number. Select where you want the page number to appear. Select the style you like and Word automatically numbers each page for you. Select Insert > Page Number, and then choose the location and style you want. If you don't want a page number to appear on the first page, select Different ... You can create templates?templates for how you want your documents to look. Thus, you can include page numbers in the template, ... Step 1: Select which page you wish to start the numbering from ... Step 4: Next make you way over to 'Insert' then hit the 'Page Number' option. Go to Insert. · Click on Page Number. · Select Top of Page. · Select the side you want the number to be. A common choice is on the right side. Click on the ?Insert? tab located in the navigation bar. · Select ?Header and Footer? and click on menu option ?Page Number?. This example shows how to number pages of a report using a Word template. It defines a right-aligned page number for odd pages and a left-aligned page ... 1. Open Microsoft Word and select New. 2. Peruse the Suggested Search categories: Business, Personal, Industry, Design Sets, Events, Education, ... Create a custom photo card, pitch your million-dollar idea, or plan your next family vacation with Microsoft Office templates. Find the perfect tool for your ... Those are tabs. When you pick Personal, Word shows all template files in your designated 'default personal templates location', which you set in ...
Industry-leading security and compliance
-
In businnes since 1997Over 25 years providing professional legal documents.
-
Accredited businessGuarantees that a business meets BBB accreditation standards in the US and Canada.
-
Secured by BraintreeValidated Level 1 PCI DSS compliant payment gateway that accepts most major credit and debit card brands from across the globe.
-
VeriSign secured#1 Internet-trusted security seal. Ensures that a website is free of malware attacks.