Delete Pages From Online Shopping Centers Templates For Free
How it works
-
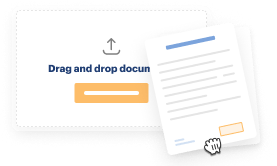
Import your Shopping Centers Forms from your device or the cloud, or use other available upload options.
-

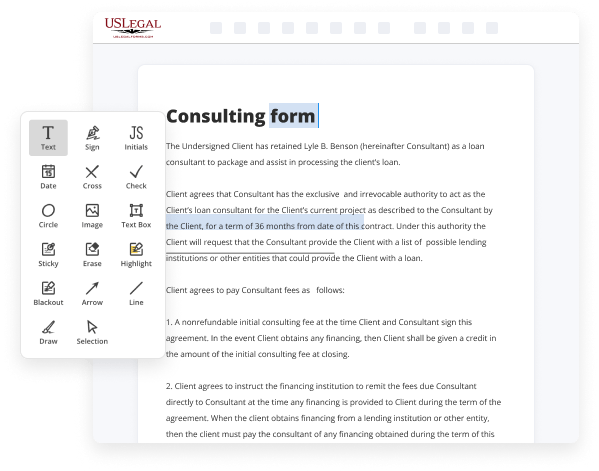
Make all necessary changes in your paperwork — add text, checks or cross marks, images, drawings, and more.
-
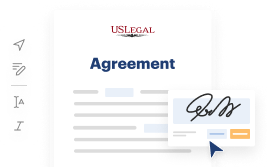
Sign your Shopping Centers Forms with a legally-binding electronic signature within clicks.
-
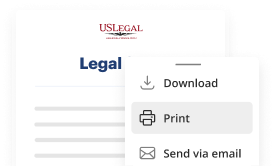
Download your completed work, export it to the cloud, print it out, or share it with others using any available methods.
How to Delete Pages From Online Shopping Centers Templates For Free
Legal documentation necessitates utmost accuracy and prompt implementation. While printing and completing forms often consumes significant time, web-based document editors demonstrate their usefulness and effectiveness. Our service is available if you’re looking for a reliable and user-friendly tool to Remove Pages From Online Shopping Centers Templates Freely and securely. Once you experience it, you'll be astonished by how straightforward handling official documents can be.
Click Finish when you are ready and choose where to save your form - download it to your device or upload it to the cloud in any necessary file format. Share a copy with others or send it for signature via email, a signing link, SMS, or fax. Request online notarization and have your document quickly witnessed. Picture conducting all of this manually in writing, where even a single mistake forces you to reprint and re-fill all the data from the start! With online tools like ours, tasks become significantly simpler. Try it now!
- Upload your document through one of the available methods - from your device, cloud storage, or PDF repository.
- You may also retrieve it from an email or direct link or through a request from another individual.
- Utilize the top toolbar to complete your form: begin entering text in designated fields and click on the box options to select suitable choices.
- Make any additional necessary adjustments: incorporate images, lines, or symbols, highlight or eliminate certain details, etc.
- Use our side tools to arrange pages - add new sheets, change their sequence, discard unnecessary ones, include page numbers if absent, etc.
- Add more fields to your document requesting different types of information and place watermarks to safeguard the content from unauthorized duplication.
- Check if all information is accurate and sign your documents - generate a legally-binding eSignature in your preferred manner and place the current date next to it.
Benefits of Editing Shopping Centers Forms Online
Top Questions and Answers
Removing a page name in Shopify is quite simple. Navigate to 'Online Store,' then 'Pages,' and select the page name you want to remove. Delete the name directly, and save your changes, ensuring your store reflects only the most relevant content.
Related Features
Tips to Delete Pages From Online Shopping Centers Templates For Free
- Make sure you have the proper permissions to delete pages on the online shopping center's platform.
- Review the content on the page you are considering deleting to ensure there is no valuable information that needs to be saved or transferred.
- Backup any data related to the page, such as product listings or customer reviews, before deleting it.
- Follow the platform's specific guidelines for deleting pages to ensure the process is done correctly.
- Double check the deletion to make sure the page has been successfully removed from the online shopping center's website.
Editing feature for deleting pages from online shopping center templates may be needed to update product offerings, remove outdated information, or reorganize the website for better navigation and user experience.
Related Searches
Option 1 - Pages panel or tab · Tap the Pages icon. · Swipe left on the title of the page you want to delete. · Tap Delete. In the Page Navigation pane, right-click the page you want to delete, and then click Delete. If you're in two-page spread view, the Delete Page dialog box will ... Click or tap anywhere in the page you want to delete, press Ctrl+G. In the Enter page number box, type \page. Press Enter on your keyboard, and then select ... In the Studio, navigate to Settings. Click Page Templates. The overview of templates opens. In the Actions column, click Delete for the page template you want ... Click Pages on the left side of the Editor. Click the relevant page. Click the Show More icon . Click Delete . Tap on the page you want to delete. · On the toolbar below the editor, tap on Delete page. Log in to the web app . Select Templates from the menu on the left-hand side. Click the template and select Edit template in the side panel. Managing your templates. To rename or delete your template, you need to use the code editor. Editing your template file might cause issues to your online store. Delete Pages Individually ... Go to Pages and click the ellipses (three dots) next to any page and look for the Trash option that appears. This will send the page ... You can add or delete pages, insert a table of contents, edit headers and footers, and update site info settings in Google Sites.
Industry-leading security and compliance
-
In businnes since 1997Over 25 years providing professional legal documents.
-
Accredited businessGuarantees that a business meets BBB accreditation standards in the US and Canada.
-
Secured by BraintreeValidated Level 1 PCI DSS compliant payment gateway that accepts most major credit and debit card brands from across the globe.
-
VeriSign secured#1 Internet-trusted security seal. Ensures that a website is free of malware attacks.