Add Textbox To Word Garnishment Templates For Free
How it works
-
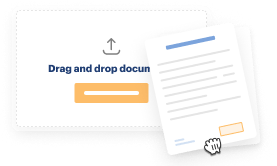
Import your Garnishment Forms from your device or the cloud, or use other available upload options.
-

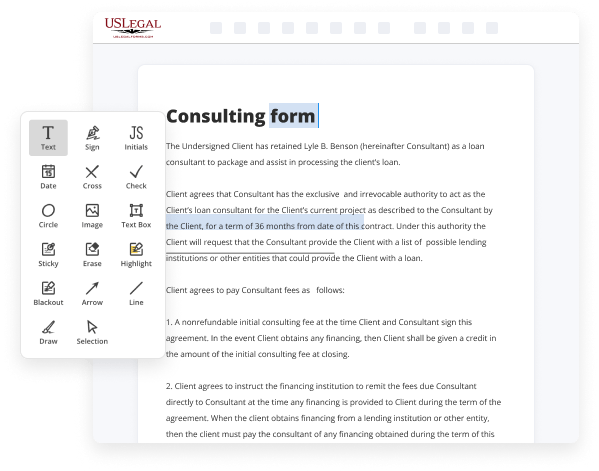
Make all necessary changes in your paperwork — add text, checks or cross marks, images, drawings, and more.
-
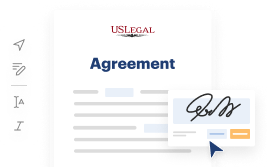
Sign your Garnishment Forms with a legally-binding electronic signature within clicks.
-
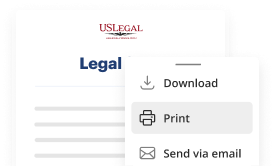
Download your completed work, export it to the cloud, print it out, or share it with others using any available methods.
How to Add Textbox To Word Garnishment Templates For Free
Are you exhausted from repetitive document printing, scanning, mailing, and squandering valuable time and resources with manual completion? The era has evolved, and the simplest method to incorporate Textbox To Word Garnishment Templates Free of charge and make other essential modifications to your forms is by managing them online. Select our fast and secure online editor to complete, adjust, and execute your legal documents with maximum efficiency.
With our service, you have no more excuses for handling legal documents manually. Save time and energy completing them online at double the speed and with greater accuracy. Give it a try today!
- Upload or import a document to the service. Drag and drop the template into the upload section, import it from the cloud, or utilize another option (comprehensive PDF catalog, emails, URLs, or direct form requests).
- Provide necessary information. Fill in empty fields using the Text, Check, and Cross tools from our top panel. Use our editor’s navigation to ensure you’ve completed everything. Highlight crucial information with the Highlight option and remove or obscure areas that hold no significance.
- Alter and rearrange the document. Use our top and side toolbars to modify your content, add extra fillable fields for various data types, reorder pages, insert new ones, or eliminate redundant pages.
- Sign and request signatures. Regardless of your chosen method, your eSignature will be legally binding and admissible in court. Send your document to others for signatures via email or signing links. Notarize the documents directly in our editor if it requires witnessing.
- Share and save the document. Download or export your finalized paperwork to the cloud in the format you prefer, print it out if you need a hard copy, and choose the most suitable file-sharing option (email, fax, SMS, or traditional mail via USPS).

Benefits of Editing Garnishment Forms Online
Top Questions and Answers
Inserting a fillable box can be done from the Developer tab. Select ‘Rich Text Content Control’ or ‘Plain Text Content Control’ to insert a fillable box in your document. This feature is particularly useful when you aim to Add Textbox To Word Garnishment Templates that require user input, enhancing the functionality of your forms.
Tips to Add Textbox To Word Garnishment Templates For Free
- Open the Word Garnishment Template in Microsoft Word.
- Click on the 'Insert' tab on the top menu.
- Select 'Text Box' from the dropdown menu.
- Click and drag to draw a text box on the template.
- Customize the text box by changing the font, size, color, and alignment.
- Type your desired text into the text box.
- Move and resize the text box as needed.
- Save the edited Word Garnishment Template.
Adding a textbox to Word Garnishment Templates can help you to include additional information or instructions in your documents. This editing feature may be needed when you want to personalize the template with specific details or provide more clarity to the recipient of the document.
Related Searches
To insert a text box, click on the Insert tab at the top of the page and select Text Box. Word will give you a number of pre-formatted options along with a ... Select the Insert tab in the ribbon and then click on WordArt. You will see a number of built-in pre-formatted options. If you like one of these, simply click ... Select the text box after adding it to your template. 1. Add a text box from the Insert. Set the fill color to "No Fill" and set the outline to ... Click in a text box to select it (so the little circles are visible on the corners). Right-click the edge of the text box and click More Layout ... Double-click the text inside a text box or shape to edit it. Click the red text box in the left column. The first click displays its array of handles. Double- ... Conga Composer can create a protected Word document, where the document is ... In the Word template, this TextBox merge field will be available to edit ... Use this button to switch between dark and light mode. Select Tag, $100K · $165 · 'sought to acquire' · & ... To create a text box: On the Insert tab, pick a shape from the Shapes gallery and drag in your document to create the size shape that you want. Start typing ... Use this button to switch between dark and light mode. Select Tag, $100K · $165 · 'sought to acquire' · & ... Looking for free Power Of Attorney Letter Word templates? Access pdfFiller's largest libraryof pre-built form templates in MS Word.
Industry-leading security and compliance
-
In businnes since 1997Over 25 years providing professional legal documents.
-
Accredited businessGuarantees that a business meets BBB accreditation standards in the US and Canada.
-
Secured by BraintreeValidated Level 1 PCI DSS compliant payment gateway that accepts most major credit and debit card brands from across the globe.
-
VeriSign secured#1 Internet-trusted security seal. Ensures that a website is free of malware attacks.