Add Text Field To Electronic Business Templates For Free
How it works
-

Import your Business Forms from your device or the cloud, or use other available upload options.
-

Make all necessary changes in your paperwork — add text, checks or cross marks, images, drawings, and more.
-

Sign your Business Forms with a legally-binding electronic signature within clicks.
-
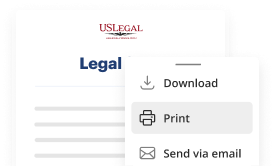
Download your completed work, export it to the cloud, print it out, or share it with others using any available methods.
How to Add Text Field To Electronic Business Templates For Free
Web-based document editors have demonstrated their dependability and effectiveness for the execution of legal documents. Utilize our secure, rapid, and user-friendly service to add text fields to electronic business templates at no cost, allowing you to modify your documents whenever necessary, with minimal effort and maximum precision.
Save the document in your preferred format. Download your document, store it in the cloud in its current format, or convert it as needed. And that’s how you can prepare and distribute any personal or business legal paperwork swiftly. Give it a try today!
- Upload a document to the editor. You have several options - upload it from your device, the cloud, or import it from a template library, an external URL, or an email attachment.
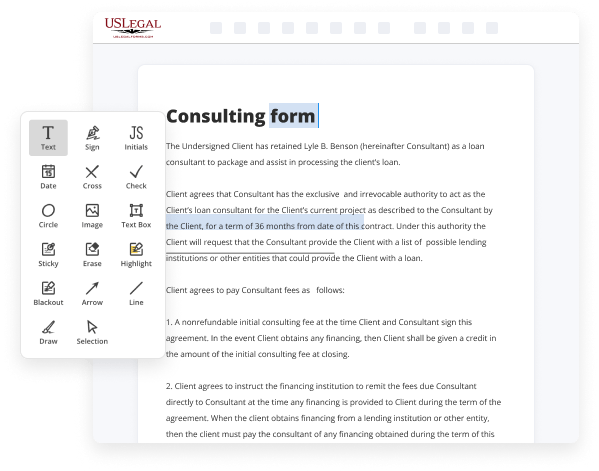
- Complete the blank fields. Place the cursor in the first vacant area and use our editor’s navigation to progress step-by-step to avoid overlooking anything on your template. Make use of the Text, Initials, Cross, and Check features.
- Implement your essential changes. Revise the form with added images, draw lines and icons, emphasize significant elements, or eliminate any unnecessary ones.
- Add additional fillable sections. Adjust the template by creating a new area for completion if required. Utilize the right-side toolbar for this, position each field where you anticipate other participants will provide their information, and designate the remaining areas as required, optional, or conditional.
- Arrange your pages. Eliminate sheets you no longer require or generate new ones while using the appropriate key, rotate them, or modify their sequence.
- Create electronic signatures. Click on the Sign option and choose how you wish to add your signature to the form - by typing your name, sketching it, uploading its image, or using a QR code.
- Distribute and send for eSigning. Conclude your editing with the Done button and transmit your copy to other parties for approval via an email request, through a Link to Fill option, or via SMS or fax message. Request a swift online notarization if necessary.

Benefits of Editing Business Forms Online
Top Questions and Answers
To make a fill-in-the-blank in Word, insert text boxes or use the underscore key for simple lines. Alternatively, you can leverage the 'Developer' tab features to add text form fields for a more interactive experience. This user-friendly approach allows you to conveniently add text field to electronic business templates that capture essential information.
Related Features
Tips to Add Text Field To Electronic Business Templates For Free
- Identify the specific location where you want to add the text field in the template.
- Decide on the size and formatting of the text field to ensure it fits seamlessly with the rest of the template.
- Use a user-friendly design software or platform that allows easy text field insertion and editing.
- Consider the purpose of the text field and tailor its placement and design to enhance user experience.
- Test the functionality of the text field by inputting and saving text to ensure it works correctly.
Adding a text field to electronic business templates can help personalize and customize the content for each individual recipient. This editing feature may be needed when you want to collect specific information from customers, such as their name, address, or feedback. By adding a text field, you can make the template more interactive and user-friendly, ultimately improving communication and engagement with your target audience.
Related Searches
This article provides information about how to add new fields to a business document template in Microsoft Excel by using Business document ... Create forms that users complete or print in Word · Show the Developer tab · Open a template or a blank document on which to base the form · Add content to the ... Apply a form field template to a document · Set up your transaction: Enter the e-mail address of at least one recipient. · Choose a template from ... liquid Add the custom text field: Open the "product-template.liquid" file and search for the area where you want to add the custom text field. How to edit "text only" field type to "numbers only" in the form fields tab? Settings>Form Fields>Address Fields. Form FieldsR Stanley DoromboziNovember 21, ... Yes, you can add a text field to an existing template at the time of calling Envelopes:create. Do this via composite templates. The best way to set this up would probably be to use custom fields. If you add a custom field with a name of "availability" and set the desired value, ... Add a rich text element in a Collection list or on a Collection page · Check the Get text from checkbox in the Inner Text Settings that appears · Connect it to ... My E-Commerce template won't allow my product copy to appear with any ... multi-line text field, but you can add a custom Rich Text field to ... Templates allow you to save and reuse repeatable information for every form, and simply put a ?placeholder? for the recipient. This way, all you ...
Industry-leading security and compliance
-
In businnes since 1997Over 25 years providing professional legal documents.
-
Accredited businessGuarantees that a business meets BBB accreditation standards in the US and Canada.
-
Secured by BraintreeValidated Level 1 PCI DSS compliant payment gateway that accepts most major credit and debit card brands from across the globe.
-
VeriSign secured#1 Internet-trusted security seal. Ensures that a website is free of malware attacks.