Add Drop-down Field To Word Wills Templates For Free
How it works
-

Import your Wills Forms from your device or the cloud, or use other available upload options.
-
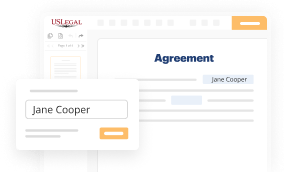
Make all necessary changes in your paperwork — add text, checks or cross marks, images, drawings, and more.
-

Sign your Wills Forms with a legally-binding electronic signature within clicks.
-
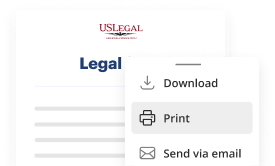
Download your completed work, export it to the cloud, print it out, or share it with others using any available methods.
How to Add Drop-down Field To Word Wills Templates For Free
Legal paperwork demands utmost accuracy and swift implementation. While producing and finalizing documents typically requires a significant amount of time, web-based PDF editors demonstrate their usefulness and effectiveness. Our platform is available if you are looking for a trustworthy and user-friendly tool to Add Drop-down Field To Word Wills Templates For Free rapidly and securely. After you give it a try, you'll be astonished at how effortless managing official documents can be.
Select Done when you are prepared and determine where to conserve your form - download it to your device or transfer it to the cloud in your desired file format. Distribute a copy to others or send it for their approval via email, signing link, SMS, or fax. Request online notarization and have your form swiftly authenticated. Picture accomplishing all this manually by hand when even a single mistake necessitates reprinting and refilling all details from scratch! With online solutions like ours, the process becomes significantly simpler. Give it a go now!
- Upload your template through one of the accessible methods - from your device, cloud, or PDF collection.
- You can also retrieve it from an email, direct link, or via a request from someone else.
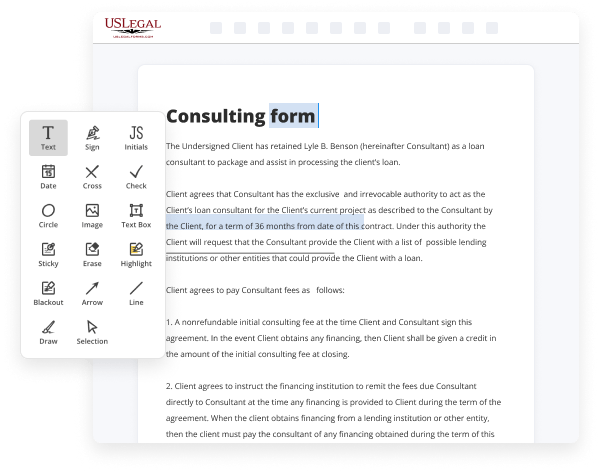
- Utilize the upper toolbar to complete your document: begin entering text in designated fields and click on the box options to select suitable choices.
- Make any additional required adjustments: add images, lines, or signatures, emphasize or eliminate certain elements, etc.
- Employ our side tools to modify page layouts - add new pages, rearrange their sequence, remove unneeded ones, include page numbers if absent, etc.
- Insert more fields to your document asking for different information types and apply watermarks to safeguard the contents from unauthorized duplication.
- Verify if everything is accurate and endorse your documents - create a legally-binding eSignature according to your preference and place the current date beside it.

Benefits of Editing Wills Forms Online
Top Questions and Answers
Adding section dividers in Word is straightforward and enhances document organization. You can use horizontal lines or insert a text box with distinctive formatting. These dividers can make your document visually appealing and functional, allowing you to incorporate drop-down fields into Word Wills templates for ease of use.
Tips to Add Drop-down Field To Word Wills Templates For Free
- Open a new Word document and go to the 'Developer' tab.
- Click on 'Drop-Down List Content Control' in the Controls group.
- Double-click on the drop-down list to customize the options.
- Type the options you want in the drop-down menu, with each option on a separate line.
- Protect the document to prevent accidental changes by clicking on 'Restrict Editing' in the 'Developer' tab.
Adding a drop-down field to Word wills templates can provide users with predefined options to select from, making it easier to fill out important information. This editing feature may be needed when creating will templates for individuals to choose beneficiaries, specify assets, or designate guardians for their children.
Related Searches
Insert a drop-down list box On the form template, place the cursor where you want to insert the control. If the Controls task pane is not visible, click More Controls on the Insert menu, or press ALT+I, C. In the Controls task pane, do one of the following: ... Under Insert controls, click Drop-Down List Box. More items... Go back to the 'Drop-Down List Properties' section at the bottom, and select 'Add.' A smaller dialog box will appear. Under 'Display Name,' type a choice and ... To add a drop-down list to a Word document, go to Options > Customize Ribbon and enable the Developer tab. Open the Developer tab and click ... To test your drop-down box, save the template as a Word document by clicking "File," "Save As" and then selecting "Word Document (*docx)" in the Save as Type ... Add Drop Down choices ... Simply type in your choice in the Display Name and select OK, you can type as many options as you'd like. Word will ... Go to the Developer tab and click the Drop-Down List Content Control button. You'll see the control pop into your document as a box with ?Choose ... From "Drop down Form Field Options" enter the drop down menu items and click on Add. These items will be inserted under "Items in Drop down List". Click the ... To add a drop-down list to your Microsoft Word document, click the Developer tab at the top and then select Drop-Down List Content Control. This ... Word 2013 · A Text Form Field will be inserted at the cursor location. · Right-click on the Form Field and select Properties. Then provide a name for the field in ... To use it, you need to place the utility in your Word Startup Folder and look for it under the Add-Ins tab in Word. Attached are screenshots of ...
Industry-leading security and compliance
-
In businnes since 1997Over 25 years providing professional legal documents.
-
Accredited businessGuarantees that a business meets BBB accreditation standards in the US and Canada.
-
Secured by BraintreeValidated Level 1 PCI DSS compliant payment gateway that accepts most major credit and debit card brands from across the globe.
-
VeriSign secured#1 Internet-trusted security seal. Ensures that a website is free of malware attacks.