Add Date Field To PDF Shopping Centers Templates For Free
How it works
-
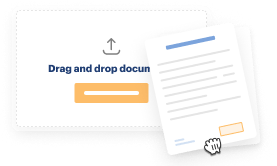
Import your Shopping Centers Forms from your device or the cloud, or use other available upload options.
-

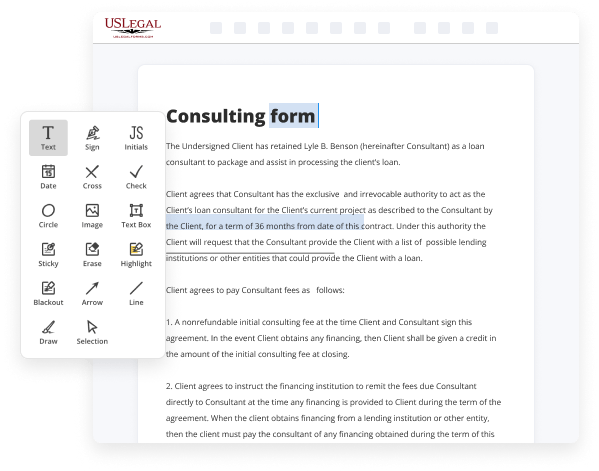
Make all necessary changes in your paperwork — add text, checks or cross marks, images, drawings, and more.
-

Sign your Shopping Centers Forms with a legally-binding electronic signature within clicks.
-
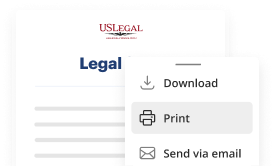
Download your completed work, export it to the cloud, print it out, or share it with others using any available methods.
How to Add Date Field To PDF Shopping Centers Templates For Free
Are you exhausted from incessant document printing, scanning, mailing, and squandering valuable time and resources with manual completion? Times have evolved, and the easiest method to Incorporate Date Field Into PDF Retail Locations Templates For Free and make any necessary adjustments to your documents is by managing them online. Utilize our swift and secure online editor to finalize, modify, and execute your legal papers with utmost efficiency.
With our service, you have no more excuses to fill out legal documents manually. Save time and effort finalizing them online at double the speed and more effectively. Give it a go now!
- Upload or import a document to the editor. Drag and drop the template into the upload section, pull it from the cloud, or use another method (comprehensive PDF library, emails, URLs, or direct form requests).
- Provide necessary information. Fill in the vacant fields using the Text, Check, and Cross tools from our top bar. Use our editor’s navigation to ensure everything is filled out. Highlight the crucial information with the Highlight feature and delete or obscure fields containing no valuable data.
- Adjust and organize the template. Utilize our top and side toolbars to refresh your content, add extra fillable fields for various types of data, rearrange pages, insert new ones, or eliminate unnecessary ones.
- Sign and request signatures. Regardless of the method you pick, your eSignature will be legally valid and acceptable in court. Dispatch your form to others for consent using email or signing links. Notarize the document directly in our editor if it requires witnessing.
- Share and store the copy. Download or export your completed documents to the cloud in your desired format, print it if you need a physical version, and select the most appropriate file-sharing method (email, fax, SMS, or delivered via regular mail using USPS).

Benefits of Editing Shopping Centers Forms Online
Top Questions and Answers
To add fillable sections to a PDF, use a PDF editor that supports form creation. You can create labeled sections for users to complete by inserting text fields, dropdowns, or checkboxes. This approach aids in organizing your add date field to PDF shopping centers templates effectively.
Tips to Add Date Field To PDF Shopping Centers Templates For Free
- Open the PDF Shopping Centers Template in a PDF editor program.
- Click on the 'Add Field' option in the toolbar.
- Select 'Date Field' from the list of field options.
- Place the Date Field in the desired location on the template.
- Adjust the size and format of the Date Field as needed.
- Save the changes to the PDF template.
Adding a Date Field to a PDF Shopping Centers Template can be useful for including the current date on documents such as lease agreements, rental agreements, or sale contracts. This editing feature may be needed when you want to provide a clear and precise timestamp for transactions or communications related to the shopping center.
Related Searches
This document explains how to manage PDF form field properties, such as adding tooltip, date & time, required or not-required fields, ... 1. Open the necessary PDF form, choose Forms & Signatures > Prepare Form and click Add a Date Field. · 2. Drag it to the designated place in your form. · 3. Insert dates from the form in the header or footer. Use this technique to make user-specified dates print in the header or footer. For example, in an expense ... Insert text that might change like dates and times into a document. ... On the Insert tab, in the Text group, click Quick Parts, and then click Field. 1 In the Editing Pane, select the table column next to which you want to add the new column. 2 Right-click that column, and select Insert Column to Left or ... Go to Customization > Forms > Advanced PDF/HTML Templates and click Customize or Edit for the advanced template. Place the cursor in the location on the ... Steps: · From your Shopify admin, click Settings > Apps and sales channels. · Click Order Printer to open the app. · Click Manage templates. · Click Add template. To start working with Field Reports, you will first need to upload your template PDF form to our website or create a custom form within PlanGrid. This template is also using the Update and Calculate Field condition that multiplies the usage and cost columns once the table is filled. Easily change the logo ... A certified Medicare Part B provider (i.e. Ambulatory Surgery Center, Portable X-ray Supplier) intending ... reported, these fields be kept up-to-date.
Industry-leading security and compliance
-
In businnes since 1997Over 25 years providing professional legal documents.
-
Accredited businessGuarantees that a business meets BBB accreditation standards in the US and Canada.
-
Secured by BraintreeValidated Level 1 PCI DSS compliant payment gateway that accepts most major credit and debit card brands from across the globe.
-
VeriSign secured#1 Internet-trusted security seal. Ensures that a website is free of malware attacks.