Add Checkboxes To Word Consent Templates For Free
How it works
-

Import your Consent Forms from your device or the cloud, or use other available upload options.
-

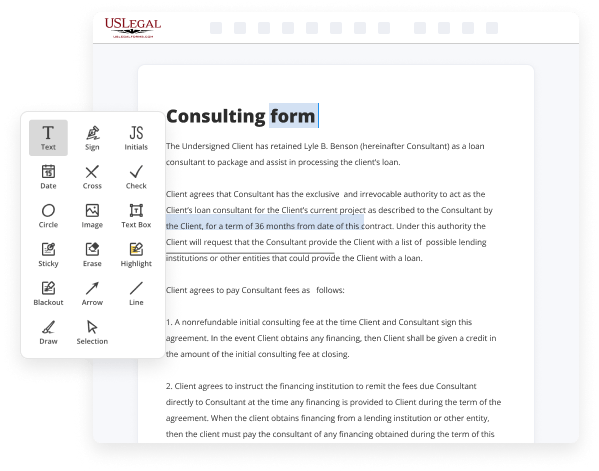
Make all necessary changes in your paperwork — add text, checks or cross marks, images, drawings, and more.
-

Sign your Consent Forms with a legally-binding electronic signature within clicks.
-

Download your completed work, export it to the cloud, print it out, or share it with others using any available methods.
How to Add Checkboxes To Word Consent Templates For Free
Web-based document editors have demonstrated their dependability and effectiveness for executing legal documents.
And that’s how you can create and distribute any personal or business legal documents in just minutes. Give it a try today!
- Import a document into the editor.
- You can choose from various options - upload it from your device or the cloud, or retrieve it from a form library, external URL, or email attachment.
- Fill in the blank spaces.
- Position the cursor in the first vacant area and use our editor’s navigation to progress step-by-step to ensure nothing is overlooked in your template.
- Utilize Text, Initials, Cross, and Check functionalities.
- Make necessary adjustments.
- Revise the document by adding images, drawing lines and icons, emphasizing important elements, or deleting any irrelevant ones.
- Add more fillable fields.
- Adjust the template with a new space for completion if necessary. Use the right-side tool pane for this, place each field where you want other participants to enter their information, and designate the remaining fields as required, optional, or conditional.
- Organize your sheets.
- Eliminate pages that you no longer require, or create new ones using the appropriate key, rotate them, or change their sequence.
- Create digital signatures.
- Select the Sign feature and decide how you’d like to input your signature onto the document - by typing your name, sketching it, uploading an image, or using a QR code.
- Distribute and request for eSigning.
- Complete your editing with the Done button and dispatch your file to others for consent via an email request, a Link to Fill option, SMS, or fax message. If necessary, seek a quick online notarization.
- Save the document in your desired format.
- Download your files, store them in the cloud in their current format, or convert them as needed.


Benefits of Editing Consent Forms Online
Top Questions and Answers
To insert a tick checkbox in Word, go to the 'Developer' tab and select 'Check Box Content Control.' Clicking the box will allow users to add a tick mark instantly. This function enhances the usability of your Word consent templates, making it clear when a task or approval is completed.
Tips to Add Checkboxes To Word Consent Templates For Free
- Open Microsoft Word and create a new document.
- Click on the 'Developer' tab in the ribbon menu.
- Click on the 'Checkbox' icon in the Controls group.
- Place the checkbox in your template where you want it to appear.
- Right-click on the checkbox to customize the properties, such as default state or size.
- You can copy and paste the checkbox to add more to your template.
- Save your template with the checkboxes added.
Adding checkboxes to Word consent templates can be helpful when you want to give the recipient the option to select or confirm certain terms or conditions. This feature can be especially useful in forms, contracts, or agreements where the user needs to indicate their agreement or choice by checking a box.
Related Searches
Insert a check box on a new, blank form template On the form template, place the cursor where you want to insert the control. If the Controls task pane is not visible, click More Controls on the Insert menu, or press ALT+I, C. Under Insert controls, click Check Box. More items... These include "Code," "Add-ins," "Controls," "Mapping," "Protect" and "Templates." In the "Controls" section, click on the checkbox icon, which ... The first is to use the word's developer tools to add the checkbox options for forms, while the second will be to change bullets to checkboxes for printed ... Place your cursor to the right of the checkbox and type a space or use your Tab key. This provides more spacing before your text. Then, add your ... Insert a checkbox in Microsoft Word · Step 1: Click the checkbox icon in the Developer tab · Step 2 (optional): Change the checkbox symbol. First, you need to customize Word's ribbon and enable the ?Developer? tab to show the option to add check boxes. Place the cursor where you want to insert checklist. Go to ?Developer? menu and click on ?Check Box Content Control? icon under ?Controls? group ... The best way to get users to consent to your Privacy Policy or Terms agreement is with an "I Agree" checkbox. This works by requesting that ... In order to create fillable forms that include checkboxes, you first need to enable the "Developer" tab on the Ribbon. With a Word document open ... Once the form builder is open and you've added the fields you'd like, we'll add a Checkboxes field. Add checkboxes to form. By default, this ...
Industry-leading security and compliance
-
In businnes since 1997Over 25 years providing professional legal documents.
-
Accredited businessGuarantees that a business meets BBB accreditation standards in the US and Canada.
-
Secured by BraintreeValidated Level 1 PCI DSS compliant payment gateway that accepts most major credit and debit card brands from across the globe.
-
VeriSign secured#1 Internet-trusted security seal. Ensures that a website is free of malware attacks.